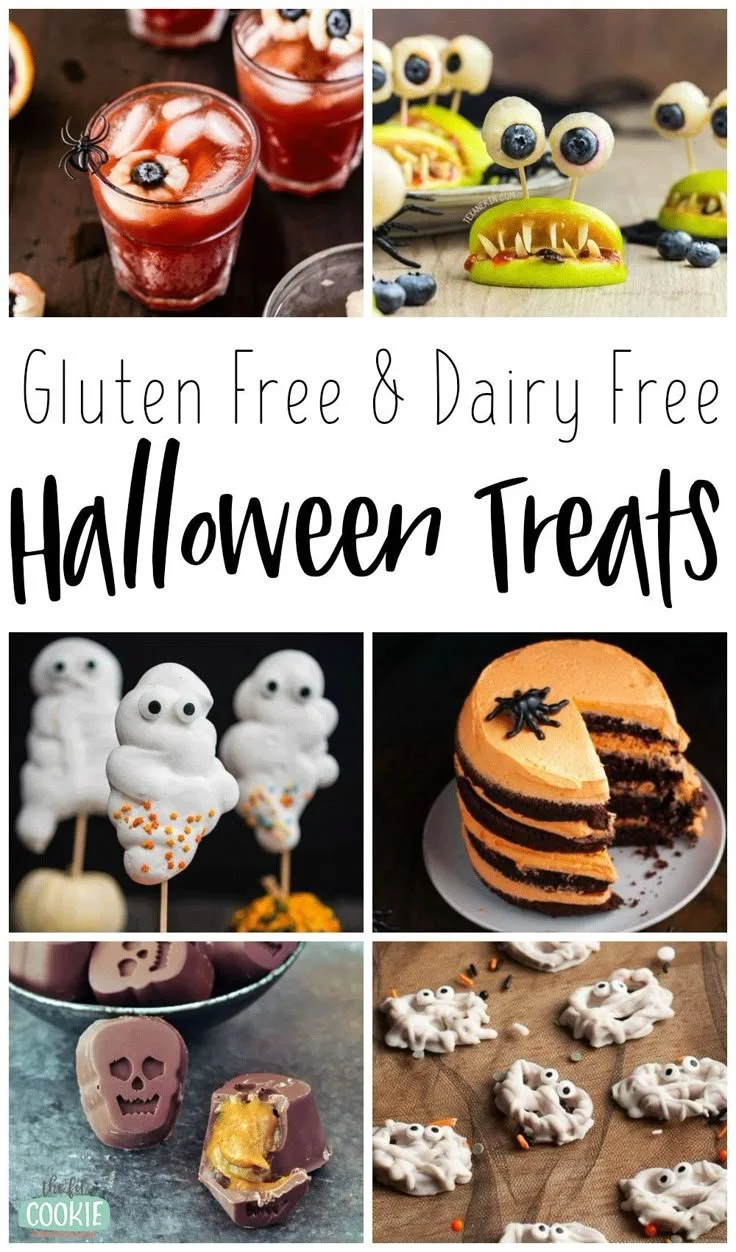
Making delicious and satisfying Gluten-Free and Dairy-Free Halloween Treats is a great way to celebrate the spooky season without compromising dietary restrictions. These treats are not only fun and festive, but they also cater to those who need to avoid gluten and dairy, making them a perfect addition to any Halloween gathering.
Why You’ll Love Gluten-Free and Dairy-Free Halloween Treats
- Allergy-Friendly Delight: These treats allow everyone to indulge during Halloween, ensuring that no one misses out on the sweet festivities.
- Easy to Make: With simple steps and accessible ingredients, you’ll find that creating these treats is straightforward and effortless, even for novice bakers.
- Customizable: You can switch up flavors and decorations to suit your tastes or themes, making each batch unique and exciting.
- Fun for Kids: Involve your little ones in the kitchen! They will love helping out with the mixing and decorating, turning treat-making into a family activity.
- Perfect for Parties: Whether for a school event or a Halloween party, these treats are perfect for sharing, making a festive contribution to any gathering.
Recipe Overview
- Prep Time: 15 minutes
- Cook Time: 20 minutes
- Total Time: 35 minutes
- Servings: 10-12 treats
- Difficulty Level: Easy
Ingredients You’ll Need for Gluten-Free and Dairy-Free Halloween Treats
- 1 cup gluten-free all-purpose flour
- This serves as the base for your treats. Ensure it includes xanthan gum for the best texture.
- 1/2 cup coconut sugar
- Adds sweetness while complimenting the texture of the treats.
- 1/4 cup cocoa powder (unsweetened)
- Provides a rich chocolate flavor; make sure it’s dairy-free.
- 1/2 teaspoon baking soda
- Helps the treats rise and become fluffy.
- 1/4 teaspoon salt
- Enhances the flavors.
- 1/4 cup non-dairy milk (almond, soy, or oat)
- Adds moisture; choose your preferred plant-based option.
- 1/4 cup coconut oil (melted)
- Provides richness and moisture without dairy.
- 1 teaspoon vanilla extract
- Enhances the overall flavor profile.
- 1 cup dairy-free chocolate chips (optional)
- For extra sweetness and a touch of indulgence.
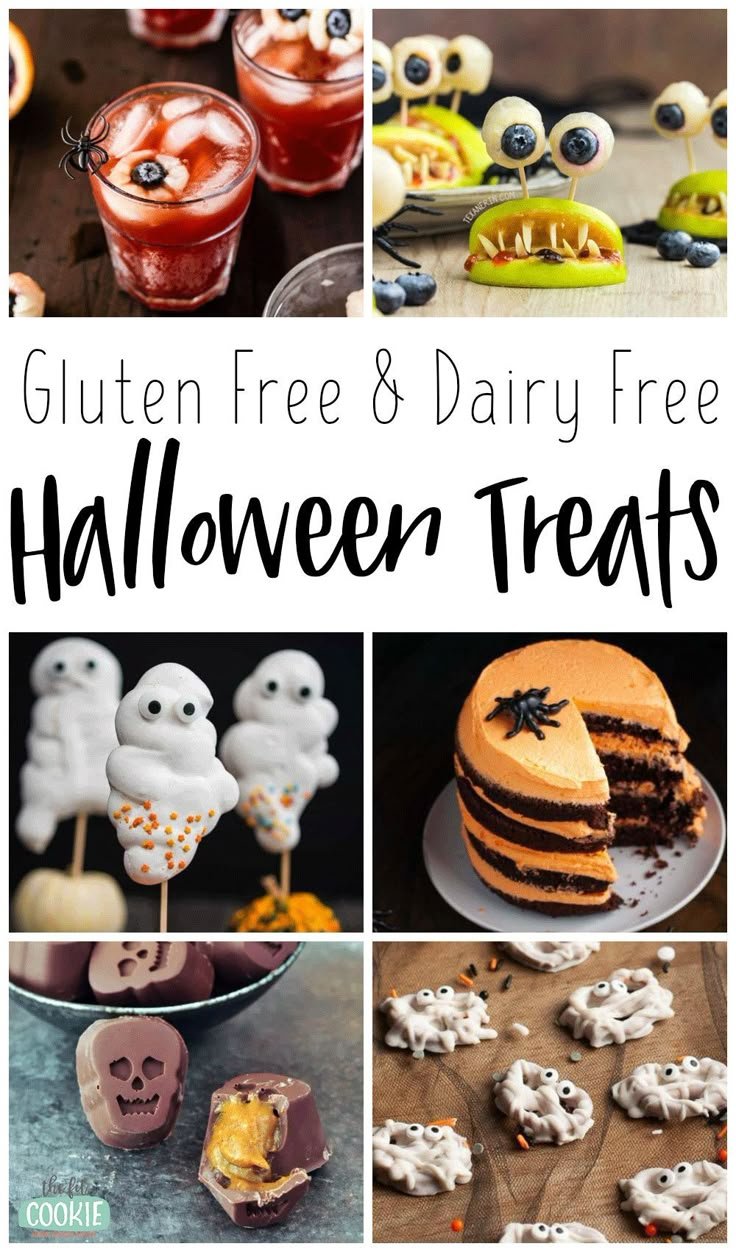
How to Make Gluten-Free and Dairy-Free Halloween Treats
-
Prep Your Workspace
Set your oven to 350°F (175°C). Line a baking pan with parchment paper or grease it lightly to prevent sticking. -
Mix the Dry Ingredients
In a large mixing bowl, combine the gluten-free flour, coconut sugar, cocoa powder, baking soda, and salt. Whisk until well mixed and no clumps remain. -
Combine the Wet Ingredients
In another bowl, whisk together the non-dairy milk, melted coconut oil, and vanilla extract until fully combined. -
Combine Wet and Dry Ingredients
Slowly pour the wet mixture into the dry mixture, stirring as you go. Mix until just combined; be careful not to over-mix as this can make the treats tough. -
Add Chocolate Chips
If you’re using chocolate chips, fold them into the batter gently until evenly distributed. -
Bake the Treats
Pour the batter into your prepared baking pan, spreading it evenly. Bake for 20 minutes or until a toothpick inserted in the center comes out clean. Let the treats cool in the pan for a few minutes before transferring to a wire rack. -
Decorate as Desired
Once the treats have cooled, you can cut them into fun Halloween shapes. Use decorating ideas like dairy-free frosting or edible glitter to get creative!
Tips for Success
- Measure Carefully: When baking gluten-free, precision is crucial. Use a kitchen scale if possible for accuracy in flour measurements.
- Don’t Overmix: Mix just until combined to keep your treats light and airy.
- Check for Gluten-Free Certification: Be sure your ingredients, especially baking soda and chocolate chips, are certified gluten-free.
- Experiment Wisely: Feel free to add ingredients like nuts or dried fruit for texture but ensure they complement the main flavors.
- Keep an Eye on Baking Time: Ovens can vary, so start checking a few minutes early to avoid overbaking.
Easy Variations
- Nut Butter Swirl: Add dollops of almond or peanut butter into the batter before baking for a nutty flavor.
- Add Pumpkin Spice: Incorporate pumpkin puree and spice blend for a fall flavor twist.
- Fruit Flavored: Substitute cocoa powder for a fruit puree like mashed bananas or applesauce for a different treat.
- Frosting Alternative: Top with a cashew or coconut cream frosting to elevate your treats.
- Sprinkles: Use gluten-free and dairy-free sprinkles for decoration to add color and excitement.
What to Serve with Gluten-Free and Dairy-Free Halloween Treats
- Fruit Cup: A light and refreshing pairing that balances the sweetness of the treats.
- Vegan Hot Chocolate: Rich and cozy, this drink complements the chocolate treats without dairy.
- Halloween-themed Snacks: Popcorn or roasted pumpkin seeds can add texture and variety.
- Nuts and Dried Fruit Mix: A healthy side that offers a crunchy contrast and additional flavor.
- Coconut Yogurt: Serve with a scoop of non-dairy yogurt for a creamy accompaniment.
Storage and Reheating
- Refrigerator Storage: Store leftovers in an airtight container in the refrigerator for up to 5 days.
- Freezer Storage: For long-term storage, freeze individual pieces wrapped in plastic wrap, then place them in a freezer bag. They should last for 2-3 months.
- Reheating: Microwave for 10-15 seconds or warm them up in the oven at a low temperature to maintain texture.
- Meal Prep Note: These treats can be made ahead of time and stored, making them a great option for Halloween festivities.
Common Mistakes to Avoid
- Using Regular Flour: Ensure you use gluten-free flour to avoid gluten contamination.
- Not Testing for Doneness: Always check with a toothpick; it’s better to underbake slightly than to overbake.
- Ignoring Temperature: Don’t skip preheating the oven; it’s important for even baking.
- Not Letting Them Cool: Allowing treats to cool entirely helps them set and enhances flavors.
- Skipping Parchment Paper: Lining your pan prevents sticking and makes it easier to lift out the treats.
Gluten-Free and Dairy-Free Halloween Treats: Background & Cultural Inspiration
Halloween has a rich history that dates back thousands of years, originally celebrated as a harvest festival by the Celts. Over time, it has evolved into a playful day of costumes and sweets. This recipe reflects the modern spirit of inclusivity and creativity, catering to dietary needs while maintaining the traditional festive flavor. Treats like these allow everyone to partake in the joy of Halloween, making it a more inclusive celebration.
Frequently Asked Questions
Can I substitute the gluten-free flour?
Yes, you can use any gluten-free blend, just ensure it includes xanthan gum for best results.
How do I store these treats?
Keep them in an airtight container in the refrigerator for up to 5 days. For longer storage, freeze individual pieces.
Can I make these treats ahead of time?
Absolutely! They can be made in advance and stored until you’re ready to celebrate.
How spicy are these treats?
These are not spicy at all. They are sweet and chocolatey, suitable for all ages.
What happens if I add too much liquid?
Adding too much liquid can make your treats dense. Stick to the recommended measurements for best results.
Final Thoughts
These Gluten-Free and Dairy-Free Halloween Treats are a delightful way to enjoy the flavors of the season while accommodating various dietary needs. They’re easy to make, customizable, and sure to be a hit at any Halloween gathering. So gather your ingredients, get the family involved, and let the celebration begin! You’ll be glad you did.
PrintGluten-Free and Dairy-Free Halloween Treats

Delicious and satisfying treats perfect for Halloween that cater to gluten and dairy dietary restrictions.
- Prep Time: 15 minutes
- Cook Time: 20 minutes
- Total Time: 35 minutes
- Yield: 10-12 treats
- Category: Dessert
- Method: Baking
- Cuisine: American
- Diet: Gluten-Free, Vegan
Ingredients
- 1 cup gluten-free all-purpose flour
- 1/2 cup coconut sugar
- 1/4 cup cocoa powder (unsweetened)
- 1/2 teaspoon baking soda
- 1/4 teaspoon salt
- 1/4 cup non-dairy milk (almond, soy, or oat)
- 1/4 cup coconut oil (melted)
- 1 teaspoon vanilla extract
- 1 cup dairy-free chocolate chips (optional)
Instructions
- Prep your workspace: Set your oven to 350°F (175°C). Line a baking pan with parchment paper or grease it lightly.
- Mix the dry ingredients: In a large bowl, combine the gluten-free flour, coconut sugar, cocoa powder, baking soda, and salt. Whisk until well mixed.
- Combine the wet ingredients: In another bowl, whisk together the non-dairy milk, melted coconut oil, and vanilla extract.
- Combine wet and dry ingredients: Slowly pour the wet mixture into the dry mixture, stirring gently until just combined.
- Add chocolate chips: Fold in the chocolate chips until evenly distributed.
- Bake the treats: Pour the batter into the prepared baking pan and bake for 20 minutes or until a toothpick inserted comes out clean.
- Decorate as desired: Once cool, cut into fun shapes and decorate with dairy-free frosting or edible glitter.
Notes
Measure carefully for best results, and get creative with your decorations!












