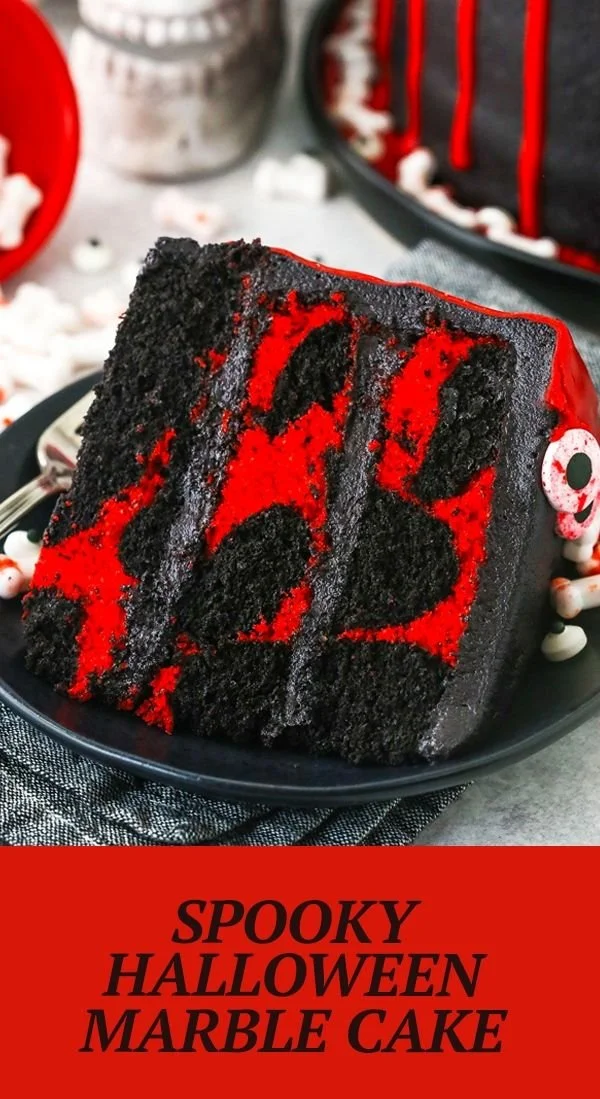
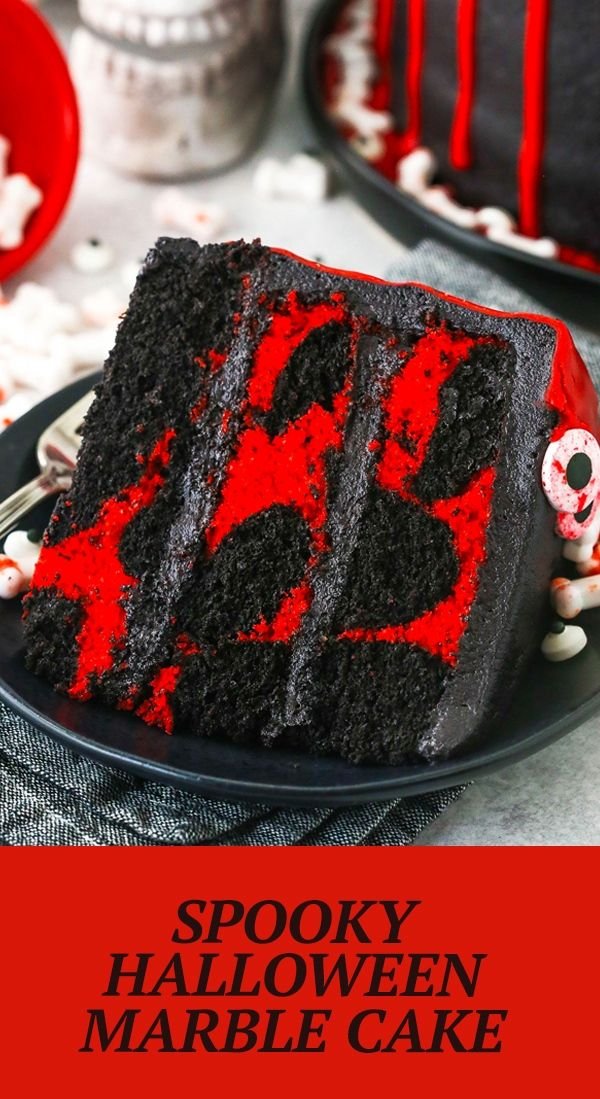
Spooky Halloween Marble Cake is a delightful treat that perfectly blends a sense of fun and flavor. This cake is not just visually impressive with its vibrant marbling, but it’s also irresistibly moist and delicious. Whether you’re hosting a Halloween party or simply looking to add some festive flair to your dessert table, this cake is worth making for its impressive presentation and delightful taste.
Why You’ll Love Spooky Halloween Marble Cake
- Visual Appeal: The striking contrast of black and orange marbled cake creates a show-stopping dessert that’s perfect for Halloween celebrations.
- Moist and Fluffy Texture: The combination of buttermilk and butter creates a cake that is both airy and moist, ensuring every bite is satisfying.
- Fun to Make: This recipe is beginner-friendly and allows for creativity, whether you’re perfecting your marbling technique or decorating with fun toppings.
- Versatile Serving Options: Enjoy it plain, topped with a rich frosting, or even decorated with spooky candies—there are countless ways to serve this cake.
- Perfect for Meal Prep: Make this cake ahead of time and store it for up to a week, making it a great option for busy schedules or last-minute gatherings.
Recipe Overview
- Prep Time: 30 minutes
- Cook Time: 30 minutes
- Total Time: 1 hour (plus cooling)
- Servings: 12 slices
- Difficulty Level: Easy
Ingredients You’ll Need for Spooky Halloween Marble Cake
To make this delicious cake, gather the following ingredients:
For the Cake
- 2 1/4 cups (293g) all-purpose flour
- 2 1/2 tsp baking powder
- 1/4 tsp baking soda
- 1/2 tsp salt
- 1/2 cup (112g) unsalted butter, room temperature
- 1/2 cup vegetable oil
- 1 1/2 cups (310g) sugar
- 1 tbsp vanilla extract
- 4 large eggs
- 1 cup (240ml) buttermilk*
- 5 oz bittersweet chocolate (60% cacao), chopped**
- Black gel icing color
- Red gel icing color
For the Frosting
- 2 1/4 cups (504g) unsalted butter
- 8 cups (920g) powdered sugar
- 1 cup (114g) natural unsweetened cocoa powder
- 2 tsp vanilla extract
- 5-7 tbsp (75-105ml) water/cream
- 1/4 tsp salt
- Black gel icing color
- 4 oz red Wilton candy melts
- 2 tbsp heavy whipping cream
- Sprinkles (for decoration, see notes)
*Buttermilk can be substituted with 1 cup of milk mixed with 1 tablespoon of vinegar or lemon juice. Let it sit for about 5 minutes before using.
**You can also substitute bittersweet chocolate with semi-sweet chocolate.
How to Make Spooky Halloween Marble Cake
-
Prepare Your Oven and Pans: Preheat your oven to 350°F (175°C). Grease and flour two 9-inch round cake pans to prevent sticking.
-
Mix Dry Ingredients: In a bowl, whisk together the all-purpose flour, baking powder, baking soda, and salt. Set aside.
-
Cream Butter and Sugars: In a large mixing bowl, beat the unsalted butter, vegetable oil, and sugar together on medium speed until light and fluffy, about 3-5 minutes.
-
Add Eggs and Vanilla: Beat in the eggs one at a time, incorporating each fully. Then add the vanilla extract and mix until combined.
-
Combine with Dry Ingredients: Gradually add the flour mixture to the wet ingredients, alternating with the buttermilk. Start and end with the flour mixture. Mix until just combined; do not overmix.
-
Prepare Chocolate Mixture: In a microwave-safe bowl, melt the chopped bittersweet chocolate until smooth. Stir in black gel icing color to achieve a rich black color.
-
Create the Marble Effect: Divide the batter equally into two bowls. Stir the chocolate mixture into one bowl. Using a spoon, alternate dollops of each batter into the prepared cake pans to create a marbled effect. Use a knife to gently swirl the batters together.
-
Bake the Cakes: Bake in the preheated oven for 25-30 minutes, or until a toothpick inserted into the center comes out clean. Let the cakes cool in the pans for about 10 minutes, then transfer them to wire racks to cool completely.
-
Make the Frosting: In a large bowl, beat the unsalted butter until smooth. Gradually mix in the powdered sugar and cocoa powder. Add vanilla extract, cream, and salt, adjusting the consistency with water/cream until you reach the desired texture.
-
Assemble the Cake: Place one cake layer on a serving plate. Spread a layer of frosting on top, then place the second layer on top. Frost the top and sides of the entire cake.
-
Decorate: Melt the red candy melts with heavy whipping cream to create a drizzle. Drizzle over the cake and finish with sprinkles for decoration.
Tips for Success
- Room Temperature Ingredients: Ensure that butter and eggs are at room temperature for the best mixing results.
- Don’t Overmix: When combining the wet and dry ingredients, mix only until incorporated to avoid a dense cake.
- Use Quality Chocolate: The flavor of your chocolate can significantly affect the cake. Choose a good quality bittersweet chocolate.
- Cool Completely: Make sure the cake layers are completely cool before frosting to prevent the frosting from melting.
- Balance Decorations: When decorating, aim for a balance that highlights the marbled effect of the cake without overwhelming it.
Easy Variations
- Spooky Chocolate Drizzle: Instead of red candy melts, use a dark chocolate drizzle to enhance the flavor.
- Add Spices: Incorporate a teaspoon of cinnamon or pumpkin spice into the batter for a seasonal twist.
- Fruit Fillings: Add layers of raspberry or orange jam between the cake layers for an extra burst of flavor.
- Gluten-Free Option: Substitute all-purpose flour with a gluten-free blend that includes xanthan gum.
- Vegan Adaptation: Use flax eggs and dairy-free alternatives for butter and buttermilk to create a vegan version.
What to Serve with Spooky Halloween Marble Cake
- Spiced Apple Cider: The warmth of spiced cider pairs beautifully with the sweetness of the cake.
- Gingerbread Cookies: Their spiced flavor compliments the chocolate and adds variety to your dessert table.
- Pumpkin Pie: A classic fall dessert that adds a seasonal touch.
- Ice Cream: A scoop of vanilla or pumpkin ice cream brings a creamy contrast to the cake.
- Fruit Salad: Light and refreshing, it balances the richness of the cake.
Storage and Reheating
- Refrigerator Storage: Store any leftover cake in an airtight container in the refrigerator for up to one week.
- Freezer Storage: Wrap individual slices in plastic wrap and then aluminum foil. Store in the freezer for up to three months.
- Best Reheating Method: Allow to thaw at room temperature or warm in the microwave for about 10 seconds just prior to serving.
- Preserve Texture: To maintain moisture, consider adding a small piece of bread in the container with the cake to absorb moisture.
Common Mistakes to Avoid
- Skipping the Greasing Step: Not preparing your pans can lead to problematic removal of the cake layers.
- Overmixing the Batter: This can create a tough texture instead of a light and fluffy cake.
- Not Monitoring Baking Time: Check for doneness a few minutes before the recommended baking time to avoid overbaking.
- Frosting While Warm: Frosting a warm cake can cause the frosting to slide off. Always ensure the cake is completely cool.
- Using Cold Ingredients: Cold butter or eggs can affect how well your batter mixes, resulting in a denser cake.
Spooky Halloween Marble Cake: Background & Cultural Inspiration
The tradition of baking themed cakes during festive occasions, especially Halloween, reflects a broader cultural trend of celebrating with food that embodies the season. The marbled cake design echoes the popular themes of mystery and enchantment associated with Halloween festivities. Combining chocolate and a vibrant orange batter, this cake symbolizes the autumn harvest, with black and orange being quintessential Halloween colors. It stands as a canvas for creativity; bakers can play with decorating styles that spark imagination, making it a delightful centerpiece for various gatherings.
Frequently Asked Questions
Can I use a cake mix instead of making the batter from scratch?
Yes, you can use a cake mix as a shortcut but adjust the butter and buttermilk according to the mix’s instructions for the best results.
How can I make this cake ahead of time?
You can bake the cake layers a day or two in advance and store them tightly wrapped in the refrigerator. Frost before serving.
What can I use instead of buttermilk?
A mixture of milk and vinegar or lemon juice works as a great substitute for buttermilk.
Can this cake be frozen?
Yes, it freezes well. Wrap slices tightly in plastic and foil, and they can be kept in the freezer for up to three months.
How can I ensure my cake is perfectly marbled?
Use a knife to gently swirl the batters together without overmixing. The goal is to create distinct swirls without merging the two colors completely.
Final Thoughts
Spooky Halloween Marble Cake is not only a treat for the eyes but also for the taste buds, making it an ideal addition to any festive gathering. Its balance of chocolate richness and vibrant color invites everyone to indulge. Whether you are a beginner baker or an experienced one, this recipe offers a fun way to celebrate the season. Try it out, and watch how it quickly becomes a favorite among family and friends!
PrintSpooky Halloween Marble Cake
A delightful and visually impressive marble cake featuring a combination of rich chocolate and vibrant orange batter, perfect for Halloween celebrations.
- Prep Time: 30 minutes
- Cook Time: 30 minutes
- Total Time: 60 minutes
- Yield: 12 slices
- Category: Dessert
- Method: Baking
- Cuisine: American
- Diet: Vegetarian
Ingredients
- 2 1/4 cups (293g) all-purpose flour
- 2 1/2 tsp baking powder
- 1/4 tsp baking soda
- 1/2 tsp salt
- 1/2 cup (112g) unsalted butter, room temperature
- 1/2 cup vegetable oil
- 1 1/2 cups (310g) sugar
- 1 tbsp vanilla extract
- 4 large eggs
- 1 cup (240ml) buttermilk*
- 5 oz bittersweet chocolate (60% cacao), chopped**
- Black gel icing color
- Red gel icing color
- 2 1/4 cups (504g) unsalted butter (for frosting)
- 8 cups (920g) powdered sugar
- 1 cup (114g) natural unsweetened cocoa powder
- 2 tsp vanilla extract (for frosting)
- 5-7 tbsp (75-105ml) water/cream
- 1/4 tsp salt (for frosting)
- Black gel icing color (for frosting)
- 4 oz red Wilton candy melts
- 2 tbsp heavy whipping cream
- Sprinkles (for decoration)
Instructions
- Prepare your oven and pans: Preheat your oven to 350°F (175°C). Grease and flour two 9-inch round cake pans to prevent sticking.
- Mix dry ingredients: In a bowl, whisk together the all-purpose flour, baking powder, baking soda, and salt. Set aside.
- Cream butter and sugars: In a large mixing bowl, beat the unsalted butter, vegetable oil, and sugar together on medium speed until light and fluffy, about 3-5 minutes.
- Add eggs and vanilla: Beat in the eggs one at a time, incorporating each fully. Then add the vanilla extract and mix until combined.
- Combine with dry ingredients: Gradually add the flour mixture to the wet ingredients, alternating with the buttermilk. Start and end with the flour mixture. Mix until just combined; do not overmix.
- Prepare chocolate mixture: In a microwave-safe bowl, melt the chopped bittersweet chocolate until smooth. Stir in black gel icing color to achieve a rich black color.
- Create the marble effect: Divide the batter equally into two bowls. Stir the chocolate mixture into one bowl. Using a spoon, alternate dollops of each batter into the prepared cake pans to create a marbled effect. Use a knife to gently swirl the batters together.
- Bake the cakes: Bake in the preheated oven for 25-30 minutes, or until a toothpick inserted into the center comes out clean. Let the cakes cool in the pans for about 10 minutes, then transfer them to wire racks to cool completely.
- Make the frosting: In a large bowl, beat the unsalted butter until smooth. Gradually mix in the powdered sugar and cocoa powder. Add vanilla extract, cream, and salt, adjusting the consistency with water/cream until you reach the desired texture.
- Assemble the cake: Place one cake layer on a serving plate. Spread a layer of frosting on top, then place the second layer on top. Frost the top and sides of the entire cake.
- Decorate: Melt the red candy melts with heavy whipping cream to create a drizzle. Drizzle over the cake and finish with sprinkles for decoration.
Notes
Ensure butter and eggs are at room temperature for the best mixing results. Don’t overmix, and use quality chocolate for better flavor.












