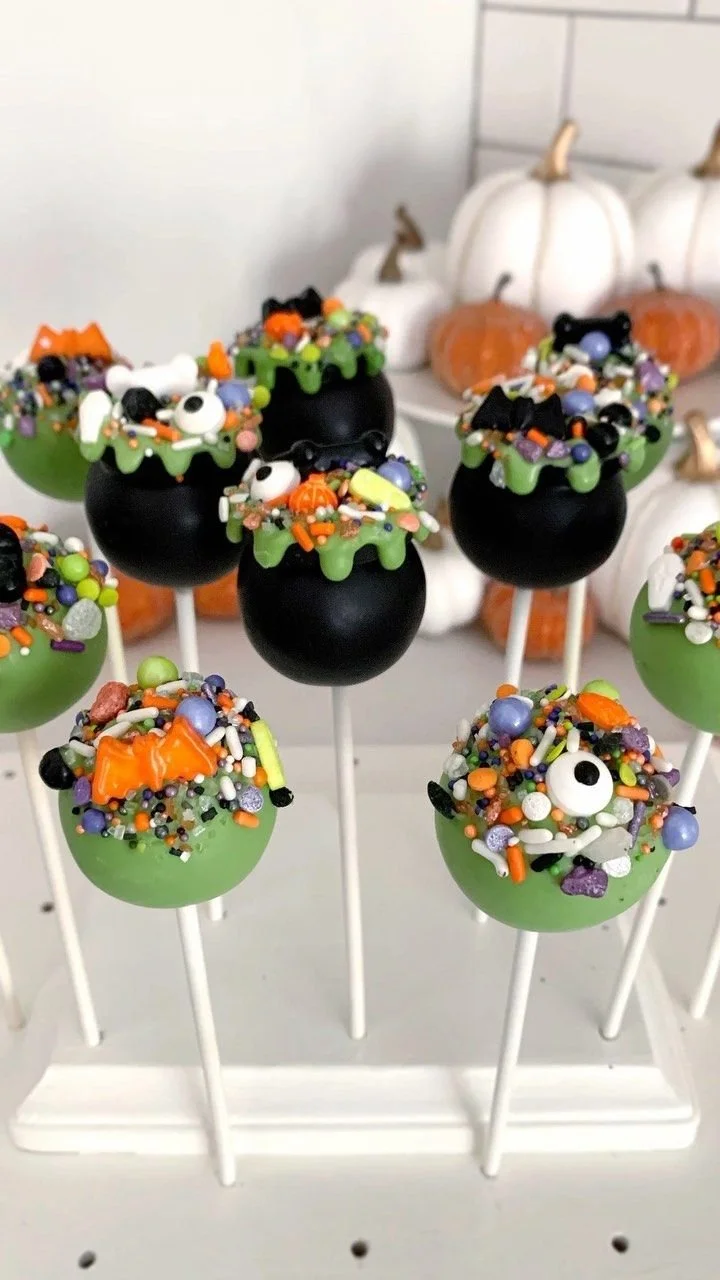
Spooky Cake Pops are the perfect way to celebrate Halloween with friends and family. These delightful treats are fun to make and even more enjoyable to eat, blending moist chocolate cake with a creamy frosting coating. Not only are they a hit at any gathering, but they’re also an adorable addition to your spooky dessert table!
Why You’ll Love Spooky Cake Pops
- Easy to Make: Even beginner cooks can whip these up! With minimal ingredients and straightforward steps, you’ll feel like a pro in no time.
- Perfect for Halloween: These cake pops bring festive spirit to your celebrations, offering a playful and tasty twist on traditional sweets.
- Customizable Designs: Use different colors and decorations to create unique cake pops that fit your theme or preference.
- Portable Treats: On lollipop sticks, these cake pops are easy to take to parties, share with friends, or enjoy on the go.
- Family Friendly: Kids will love helping to decorate and eat these fun treats, making it a terrific family activity.
Recipe Overview
- Prep Time: 30 minutes
- Cook Time: 30 minutes
- Total Time: 60 minutes (plus freezing time)
- Servings: 12 cake pops
- Difficulty Level: Easy
Ingredients You’ll Need for Spooky Cake Pops
- 1 cup chocolate cake mix
- 1/2 cup frosting (store-bought or homemade)
- 1 cup chocolate chips
- Green candy melts
- Black and orange sprinkles
- Lollipop sticks
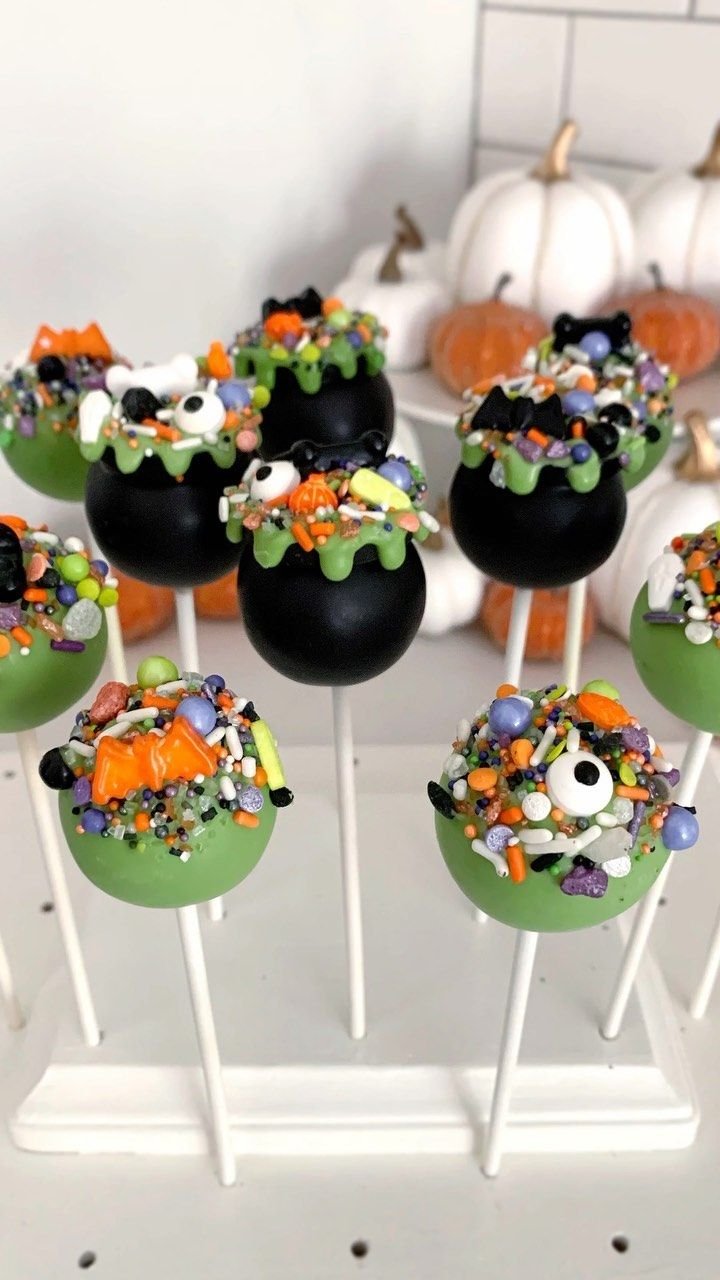
- Mini cauldron containers (optional for serving)
Notes:
- Cake Mix: You can use any chocolate cake mix of your choice, including gluten-free options if needed.
- Frosting: Cream cheese frosting adds a delicious tang, while buttercream keeps things sweet.
- Sprinkles: Feel free to get creative with your decoration; edible glitter or other Halloween-themed sprinkles can add extra flair.
How to Make Spooky Cake Pops
-
Prepare the Cake: Preheat your oven and bake the chocolate cake mix according to the package instructions. Let it cool completely after baking.
-
Crumble the Cake: Once the cake is cool, crumble it into a large bowl. Add the frosting and mix until fully combined and the mixture is moist but not too sticky.
-
Form the Balls: Using your hands, form small balls (about 1 inch in diameter) from the mixture and place them on a baking sheet lined with parchment paper.
-
Freeze the Balls: Freeze the cake balls for about 30 minutes. This helps them firm up, making them easier to work with.
-
Prepare the Lollipop Sticks: Melt a small amount of chocolate chips in the microwave. Dip the tip of each lollipop stick into the melted chocolate, then insert it into the center of each cake ball.
-
Set the Sticks: Place the cake pops back in the freezer for an additional 10 minutes to let the melted chocolate set and secure the sticks.
-
Melt the Candy Coating: In a microwave-safe bowl, melt the green candy melts in short bursts, stirring in between until smooth.
-
Coat the Cake Pops: Dip each cake pop into the melted candy, ensuring it’s fully coated. Allow excess coating to drip off before decorating.
-
Add Sprinkles: Before the coating hardens, sprinkle black and orange sprinkles on top to add that spooky touch.
-
Display & Enjoy: Place the finished cake pops in mini cauldrons or arrange them upright in a foam base for a fun display. Enjoy your spooky treats!
Tips for Success
- Consistent Size: Try to keep each cake ball uniform in size for even coating and presentation.
- Cool Completely: Make sure the cake is completely cool before crumbling; this helps prevent a gummy mixture.
- Thick Coating: Ensure the candy coating is thick enough to hide any imperfections; a second layer may be necessary for complete coverage.
- Avoided Melting: Keep melted chocolate and candy warm but not too hot while working to avoid seizing or burning.
Easy Variations
- Flavor Twist: Experiment with different cake mixes like red velvet or vanilla for a unique flavor profile.
- Dairy-Free: Use dairy-free cake mix and frosting to make these pops accessible for lactose-intolerant guests.
- Spiced Cake: Add a hint of cinnamon or nutmeg to the cake batter for an autumn-inspired twist.
- Chocolate Drizzle: After coating with green candy melts, drizzle melted chocolate on top for an extra festive touch.
What to Serve with Spooky Cake Pops
- Hot Apple Cider: The warmth and spice of apple cider pairs beautifully with the sweetness of cake pops.
- Gingerbread Cookies: Create a lovely dessert table with a mix of sweet treats including gingerbread for a cozy touch.
- Pumpkin Spice Cupcakes: Keep the Halloween theme alive with these seasonal favorites that complement cake pops well.
- Fruit Platter: A refreshing fruit platter with seasonal fruits can balance the sweetness of the cake pops.
Storage and Reheating
- Refrigerator Storage: Store uneaten cake pops in an airtight container in the fridge for up to 5 days.
- Freezer Storage: For longer storage, freeze the cake pops in a single layer before transferring them to a freezer bag. They can last up to 2 months.
- Thawing: To eat, simply remove from the freezer and let them thaw at room temperature for about 15 minutes.
- Preserving Texture: Keep the pops in their container to minimize moisture loss, which can lead to a dry texture.
Common Mistakes to Avoid
- Overmixing: Don’t overwork the cake and frosting mixture, or the pops may become dense.
- Skewering Too Deep: Avoid inserting the lollipop sticks too deep; just enough to secure them will keep the pops intact without falling apart.
- Melted Coating: Ensure your candy melts are warm enough to dip but not too hot to avoid burning or seizing.
Spooky Cake Pops: Background & Cultural Inspiration
These delightful treats have become a popular snack during Halloween celebrations. The tradition of cake pops can be traced back to the early 2000s, but the idea of lollipop treats dates much further back. By combining cake and frosting and presenting them in a whimsical manner, cake pops have transformed into a staple dessert for both festive occasions and casual gatherings. Their adaptability to flavor and decoration makes them an ideal fit for any celebratory theme, especially Halloween.
Frequently Asked Questions
Can I make cake pops ahead of time?
Yes, you can prepare the cake balls in advance and freeze them until you’re ready to coat them.
How can I substitute the cake mix?
You can use any flavor of cake mix, including gluten-free options. Just ensure you follow the cooking instructions relevant to the mix you choose.
Can I use different candy colors?
Absolutely! You can use any colors of candy melts or coatings to fit your preferred holiday or occasion.
How do I prevent the coating from cracking?
Let the cake pops cool completely before dipping, and ensure the coating is at the right temperature – warm enough to dip but not hot enough to melt.
What’s the best way to store these cake pops?
Store cake pops in an airtight container in the fridge for up to 5 days or freeze them for longer storage.
Final Thoughts
Spooky Cake Pops are a fun and delicious way to celebrate Halloween with friends and family. Easy to make and customizable, these treats are sure to bring smiles to everyone who tries them. Whether you’re hosting a Halloween party or looking for a festive snack, these cake pops are worth making. Enjoy the process, and don’t forget to get creative with your designs!
PrintSpooky Cake Pops
Halloween-inspired cake pops made with chocolate cake and decorated with festive sprinkles.
- Prep Time: 30 minutes
- Cook Time: 30 minutes
- Total Time: 60 minutes
- Yield: 12 cake pops
- Category: Dessert
- Method: Baking
- Cuisine: American
- Diet: Vegetarian
Ingredients
- 1 cup chocolate cake mix
- 1/2 cup frosting (store-bought or homemade)
- 1 cup chocolate chips
- Green candy melts
- Black and orange sprinkles
- Lollipop sticks
- Mini cauldron containers (optional for serving)
Instructions
- Prepare the cake: Preheat your oven and bake the chocolate cake mix according to the package instructions. Let it cool completely after baking.
- Crumble the cake: Once the cake is cool, crumble it into a large bowl. Add the frosting and mix until fully combined and the mixture is moist but not too sticky.
- Form the balls: Using your hands, form small balls (about 1 inch in diameter) from the mixture and place them on a baking sheet lined with parchment paper.
- Freeze the balls: Freeze the cake balls for about 30 minutes. This helps them firm up, making them easier to work with.
- Prepare the lollipop sticks: Melt a small amount of chocolate chips in the microwave. Dip the tip of each lollipop stick into the melted chocolate, then insert it into the center of each cake ball.
- Set the sticks: Place the cake pops back in the freezer for an additional 10 minutes to let the melted chocolate set and secure the sticks.
- Melt the candy coating: In a microwave-safe bowl, melt the green candy melts in short bursts, stirring in between until smooth.
- Coat the cake pops: Dip each cake pop into the melted candy, ensuring it’s fully coated. Allow excess coating to drip off before decorating.
- Add sprinkles: Before the coating hardens, sprinkle black and orange sprinkles on top to add that spooky touch.
- Display & enjoy: Place the finished cake pops in mini cauldrons or arrange them upright in a foam base for a fun display. Enjoy your spooky treats!
Notes
Feel free to get creative with your decoration; edible glitter or other Halloween-themed sprinkles can add extra flair.












