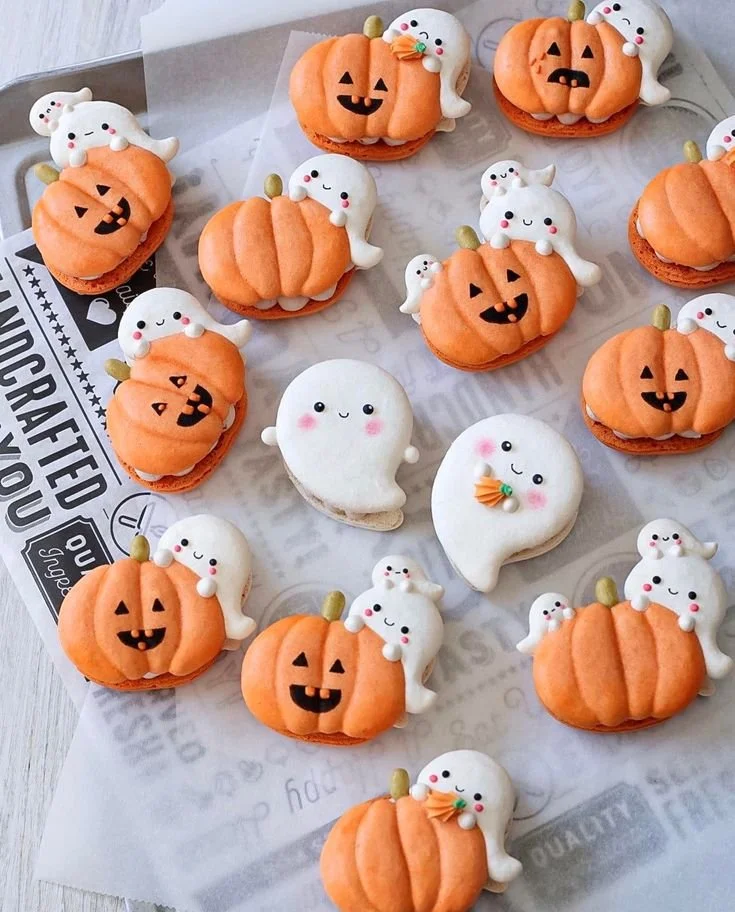
Making delicious Halloween treats like Decorated Pumpkins and Ghost Cookies can be a delightful way to celebrate the spooky season. These festive cookies not only look charming but also offer a fun activity for families and friends to enjoy together. With easy-to-follow instructions and colorful decorations, you’ll have an impressive dessert for your Halloween festivities.
Why You’ll Love Decorated Pumpkins and Ghost Cookies
- Fun for All Ages: Kids and adults alike will enjoy decorating these cookies, making it a perfect family activity.
- Customizable Designs: Use various colors and shapes to create unique ghost and pumpkin characters that reflect your style and creativity.
- Delicious Taste: These cookies offer a soft and chewy texture with just the right amount of sweetness to satisfy your cravings.
- Simple Ingredients: You can whip these cookies up using pantry staples, saving you time and effort.
- Great for Parties: These eye-catching cookies are ideal for Halloween parties, school events, or as gifts for friends and neighbors.
Recipe Overview
- Prep Time: 30 minutes
- Cook Time: 12-15 minutes
- Total Time: 45 minutes
- Servings: Makes about 24 cookies
- Difficulty Level: Easy
Ingredients You’ll Need for Decorated Pumpkins and Ghost Cookies
For the Cookies:
- 2 ¾ cups all-purpose flour: This creates the base of the cookie for a chewy texture.
- 1 teaspoon baking soda: Helps the cookies rise and stay fluffy.
- ½ teaspoon baking powder: Works along with baking soda for perfect leavening.
- 1 teaspoon salt: Enhances the flavors.
- 1 cup unsalted butter, softened: Provides richness and moisture.
- 1 cup granulated sugar: Sweetens the cookies.
- 1 cup brown sugar: Adds moisture and a slight caramel flavor.
- 2 large eggs: Binds the ingredients together.
- 1 teaspoon vanilla extract: Gives a lovely aromatic flavor.
For the Royal Icing:
- 3 cups powdered sugar: The main ingredient for sweet, smooth icing.
- 2 tablespoons meringue powder: Helps stabilize the icing for decorating.
- 5-6 tablespoons water: Adjust for desired consistency.
For Decoration:
- Edible food coloring: For making your pumpkins orange and ghosts white.
- Chocolate chips: For ghost eyes and pumpkin details.
- Sprinkles: Adds fun textures and colors to your cookies.
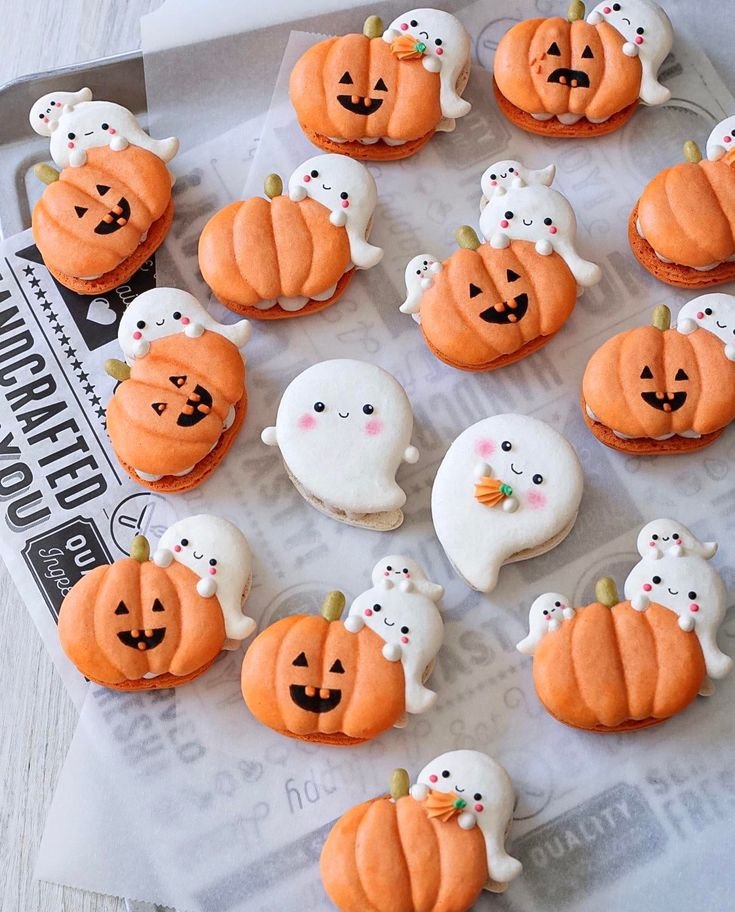
How to Make Decorated Pumpkins and Ghost Cookies
-
Prepare the Dough: In a bowl, combine flour, baking soda, baking powder, and salt. In a separate large bowl, cream the softened butter, granulated sugar, and brown sugar until light and fluffy. Beat in the eggs and vanilla extract until well combined.
-
Mix: Gradually add the dry ingredients into the butter mixture, stirring until everything is combined well. The dough will be soft.
-
Chill the Dough: Cover the dough in plastic wrap and refrigerate for at least 30 minutes. Chilling helps the cookies retain their shape when baked.
-
Preheat the Oven: Preheat your oven to 350°F (175°C). Line baking sheets with parchment paper.
-
Roll and Cut: Roll out the chilled dough on a floured surface to about ½ inch thick. Use cookie cutters in pumpkin and ghost shapes to cut out the cookies. Place the cookies on the prepared baking sheets.
-
Bake: Bake for 12-15 minutes or until the edges are lightly golden. Let them cool on the baking sheets for a few minutes, then transfer to wire racks to cool completely.
-
Make the Royal Icing: In a bowl, mix powdered sugar, meringue powder, and water until smooth. Adjust the water for the desired consistency for icing.
-
Decorate the Cookies: Divide the icing into bowls and add food coloring to create orange for pumpkins and white for ghosts. Use piping bags or offset spatulas to decorate your cookies; add chocolate chips for eyes and festive sprinkles as desired.
-
Let Icing Set: Allow the decorated cookies to dry completely before serving to ensure the icing hardens.
Tips for Success
- Don’t Skip Chilling: Chilling the dough helps maintain the shape of the cookies during baking.
- Test Icing Consistency: The icing should flow easily but hold its shape. Adjust with more water or powdered sugar as needed.
- Use Parchment Paper: Lining your baking sheets prevents the cookies from sticking and makes cleanup easier.
- Practice Decoration: If you’re new to decorating, practice on a paper plate before working on the cookies.
- Keep Icing Covered: When not in use, cover the royal icing to prevent it from drying out.
Easy Variations
- Different Shapes: Use cookie cutters for other Halloween shapes like bats or witches.
- Flavor Additions: Add spices such as cinnamon or nutmeg to the cookie dough for a warm flavor.
- Buttercream Icing: Replace royal icing with buttercream for a creamier texture, perfect for spreading.
- Add Nuts: Incorporate chopped nuts into the dough for a bit of crunch.
- Gluten-Free Version: Substitute all-purpose flour with a gluten-free baking blend.
What to Serve with Decorated Pumpkins and Ghost Cookies
- Hot Chocolate: A warm mug of hot chocolate complements the sweetness of the cookies perfectly.
- Apple Cider: Serve with spiced apple cider for a cozy autumn treat.
- Milk: Classic milk enhances the creamy goodness of the cookies.
- Halloween Cupcakes: Pair your cookies with themed cupcakes for a delightful dessert table.
- Fruit Platter: Include fresh fruit for a refreshing contrast to the sweetness of the cookies.
Storage and Reheating
- Refrigerator Storage: Store decorated cookies in an airtight container in the refrigerator for up to one week.
- Freezer Storage: Freeze unbaked cookie dough in a sealed bag for up to two months. Bake from frozen, adding a minute or two to the baking time.
- Best Reheating Method: If you prefer warm cookies, pop them in the microwave for about 10-15 seconds.
- Preserve Texture: To keep the cookies soft, place a slice of bread in the container with them for moisture.
Common Mistakes to Avoid
- Overmixing Dough: Mix just until combined to avoid tough cookies.
- Inaccurate Measurements: Use a kitchen scale or correct measuring cups for precise measurements of ingredients.
- Leaving Icing Too Soft: Ensure the royal icing is thick enough to hold its shape.
- Skipping Cooling Time: Ice only on completely cooled cookies to prevent melting.
- Rushing the Icing Process: Allow enough time for the icing to dry completely before packaging or serving.
Decorated Pumpkins and Ghost Cookies: Background & Cultural Inspiration
These cookies are a playful twist on traditional Halloween baking. Originating in the United States, Halloween cookies often celebrate the fun and whimsical aspects of the season. The shapes of pumpkins and ghosts are integral to Halloween imagery, representing the festive spirit of trick-or-treating and community gatherings. Decorating cookies allows families to come together and express their creativity, making it a cherished tradition in many households.
Frequently Asked Questions
Can I make the dough in advance?
Yes, you can prepare the dough up to two days in advance and keep it refrigerated until ready to use.
How can I adjust the sweetness of the cookies?
You can reduce the sugar slightly or use a sugar substitute if desired, though this may affect the texture.
What if I don’t have meringue powder?
You can use egg white instead of meringue powder for the royal icing, but ensure the icing is stored in the refrigerator to prevent spoilage.
How long can these cookies sit out after decorating?
Decorated cookies can sit at room temperature for 2 to 3 days, provided they are stored in an airtight container to keep them fresh.
Can I use store-bought icing?
Yes, you can use store-bought icing for quick decorating, but homemade icing typically tastes better and allows for more customization.
Final Thoughts
Decorated Pumpkins and Ghost Cookies make for delightful Halloween treats that are not only delicious but also a joy to create. This recipe encourages creativity while bringing people together to celebrate the season. Whether you’re making them for a party or simply enjoying a cozy evening at home, these cookies are sure to bring smiles to everyone’s faces. Happy baking!
PrintDecorated Pumpkins and Ghost Cookies

Delightful Halloween cookies decorated as pumpkins and ghosts, perfect for family activities and celebrations.
- Prep Time: 30 minutes
- Cook Time: 15 minutes
- Total Time: 45 minutes
- Yield: 24 cookies
- Category: Dessert
- Method: Baking
- Cuisine: American
- Diet: Vegetarian
Ingredients
- 2 ¾ cups all-purpose flour
- 1 teaspoon baking soda
- ½ teaspoon baking powder
- 1 teaspoon salt
- 1 cup unsalted butter, softened
- 1 cup granulated sugar
- 1 cup brown sugar
- 2 large eggs
- 1 teaspoon vanilla extract
- 3 cups powdered sugar (for royal icing)
- 2 tablespoons meringue powder (for royal icing)
- 5-6 tablespoons water (for royal icing)
- Edible food coloring (for decoration)
- Chocolate chips (for decoration)
- Sprinkles (for decoration)
Instructions
- Prepare the Dough: In a bowl, combine flour, baking soda, baking powder, and salt. In a separate large bowl, cream the softened butter, granulated sugar, and brown sugar until light and fluffy. Beat in the eggs and vanilla extract until well combined.
- Mix: Gradually add the dry ingredients into the butter mixture, stirring until everything is combined well. The dough will be soft.
- Chill the Dough: Cover the dough in plastic wrap and refrigerate for at least 30 minutes. Chilling helps the cookies retain their shape when baked.
- Preheat the Oven: Preheat your oven to 350°F (175°C). Line baking sheets with parchment paper.
- Roll and Cut: Roll out the chilled dough on a floured surface to about ½ inch thick. Use cookie cutters in pumpkin and ghost shapes to cut out the cookies. Place the cookies on the prepared baking sheets.
- Bake: Bake for 12-15 minutes or until the edges are lightly golden. Let them cool on the baking sheets for a few minutes, then transfer to wire racks to cool completely.
- Make the Royal Icing: In a bowl, mix powdered sugar, meringue powder, and water until smooth. Adjust the water for the desired consistency for icing.
- Decorate the Cookies: Divide the icing into bowls and add food coloring to create orange for pumpkins and white for ghosts. Use piping bags or offset spatulas to decorate your cookies; add chocolate chips for eyes and festive sprinkles as desired.
- Let Icing Set: Allow the decorated cookies to dry completely before serving to ensure the icing hardens.
Notes
Chilling the dough is crucial for maintaining cookie shape during baking. Practice decorating techniques if you’re a beginner.












