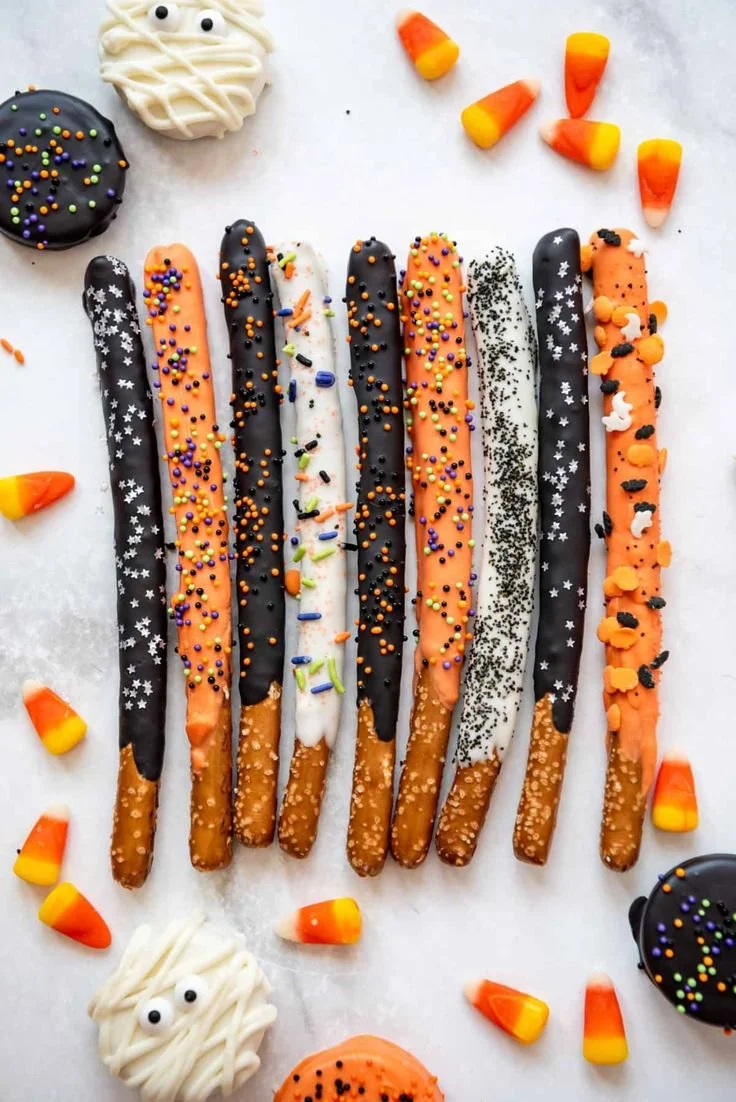
Chocolate Covered Halloween Pretzels are not only a fun treat to make but also a delightful addition to any spooky gathering. With their combination of salty pretzels, creamy candy melts, and colorful toppings, these treats are perfect for satisfying your sweet tooth with a crunch. They’re easy to whip up, making them an ideal project for both kids and adults, and they bring a festive flair to your Halloween celebrations.
Why You’ll Love Chocolate Covered Halloween Pretzels
- Easy to Make: This recipe requires minimal ingredients and no baking, making it perfect for beginners and those looking for a quick treat.
- Great for All Occasions: Whether it’s a party, school event, or just a fun night in, these pretzels fit right in.
- Customizable Toppings: You can get creative with your choice of sprinkles and candies, tailoring each batch to suit your taste or theme.
- Perfect for Kids: This is a fantastic project for kids, combining simple techniques and lots of fun in the decorating process.
- Deliciously Sweet and Salty: The combination of chocolate and pretzels offers a satisfying mix of flavors and textures that everyone loves.
Recipe Overview
- Prep Time: 15 minutes
- Cook Time: 10 minutes
- Total Time: 25 minutes
- Servings: About 12 pretzel rods
- Difficulty Level: Easy
Ingredients You’ll Need for Chocolate Covered Halloween Pretzels
- Pretzel Rods: The salty base that complements the sweetness of the chocolate. Look for thick rods for added crunch.
- Candy Melts: Use any color you want. Popular choices for Halloween are orange, black, and purple, which bring a festive look.
- Holiday Sprinkles: These add a pop of color and texture. Use Halloween-themed sprinkles like ghosts, pumpkins, or bats.
- Candy Corn (optional): A classic Halloween candy that you can scatter on top for an extra sweet bite.
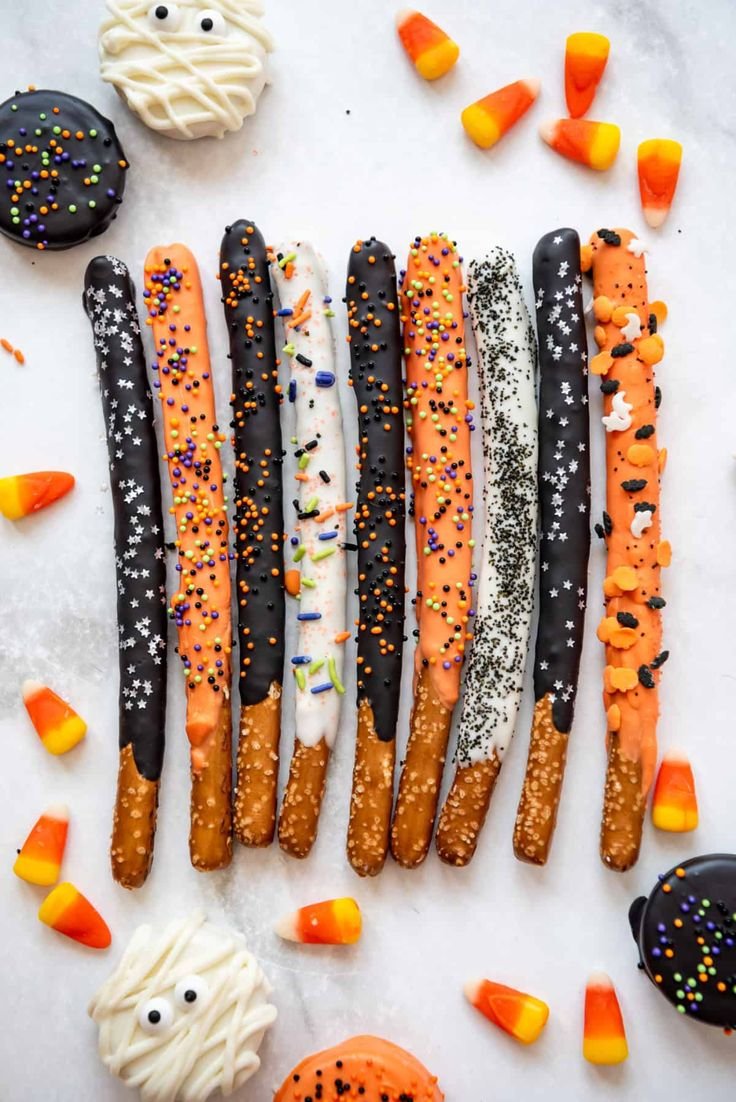
How to Make Chocolate Covered Halloween Pretzels
-
Melt the Candy Melts: Follow the package instructions to melt your candy melts in a microwave-safe bowl. Stir until smooth to avoid lumps.
-
Dip the Pretzel Rods: Take each pretzel rod and dip it into the melted candy, ensuring it’s fully coated. Swirl it gently to remove excess candy.
-
Arrange on Baking Sheet: Place the coated pretzels on a parchment-lined baking sheet. Make sure they are not touching to prevent them from sticking together.
-
Add Toppings: While the candy coating is still wet, generously sprinkle with holiday sprinkles and add candy corn on top for a festive look.
-
Cool and Harden: Allow the decorated pretzels to cool completely at room temperature until the candy has hardened.
Tips for Success
- Choose High-Quality Candy Melts: This will improve the flavor and consistency of your coating.
- Work in Batches: If you’re making a large number of pretzels, work in smaller batches to keep the candy melts warm for dipping.
- Experiment with Melting Techniques: If using a microwave, melt in short intervals to prevent burning. Alternatively, consider using a double boiler for more control.
- Let Toppings Set: Give the pretzels adequate cooling time so the toppings stick well and don’t fall off.
- Be Creative: Don’t hesitate to add other treats like crushed cookies or nuts for additional crunch and flavor.
Easy Variations
- Chocolate Drizzles: For a fancier appearance, melt dark or white chocolate and drizzle it over the hardened candy coating.
- Nutty Pretzels: Add crushed nuts like almonds or peanuts on top of the melted candy for a delicious crunch.
- Flavor Infusions: Use flavored candy melts, such as mint or peanut butter, to give a twist to the traditional taste.
- Themed Designs: Use melted chocolate to create spider web patterns, or decorate the pretzels with themed candies for different festive occasions.
- Gluten-Free Option: Swap standard pretzel rods for gluten-free pretzels to accommodate dietary needs.
What to Serve with Chocolate Covered Halloween Pretzels
- Hot Apple Cider: The perfect warm drink that complements the sweet and salty flavors of the pretzels.
- Pumpkin Spice Cookies: Pairing these treats with cookies can enhance the autumnal experience.
- Chocolate Milk: A classic beverage choice that pairs perfectly with the deep chocolate flavor of the pretzels.
- Cheese Board: Include a variety of cheeses and crackers alongside the pretzels for a well-rounded snack table.
- Halloween-Themed Cupcakes: Add a sweet touch to your dessert table with visually appealing cupcakes that pick up on the Halloween theme.
Storage and Reheating
- Refrigerator Storage: Keep any leftovers in an airtight container at room temperature for up to a week. Avoid refrigeration, as it may cause the chocolate to sweat and change texture.
- Freezer Storage: If you need to store them for a longer period, freeze them in a single layer in a freezer-safe container. They can last up to a month.
- Reheating Method: If you’d like to eat them warm, place them in a preheated oven at a low temperature for a few minutes.
- Preserve Texture: For best results, consume them fresh, as the texture may change over time.
Common Mistakes to Avoid
- Too Thick Coating: Ensure that the candy melts are well-melted to avoid a thick coating that doesn’t set properly.
- Skipping the Parchment Paper: Always line your baking sheet to prevent the pretzels from sticking, making them difficult to remove.
- Rushing the Cooling Process: Patience is key; allow the pretzels to cool completely to ensure the candy sets right.
- Using Cold Ingredients: Ensure the pretzel rods are at room temperature before dipping; otherwise, the coating might clump.
- Not Watching Toppings: Apply toppings quickly while the candy is wet; otherwise, they won’t stick.
Chocolate Covered Halloween Pretzels: Background & Cultural Inspiration
Chocolate covered pretzels are a popular treat in the United States, especially around holidays. They blend two favorite snacks: salty pretzels and sweet chocolate, making them a go-to for parties and celebrations. During Halloween, creativity runs wild, inspiring beautiful and fun designs, making these treats a favorite among families. The tradition of combining sweet and salty snacks is rooted in American culinary creativity, emphasizing indulgence in a playful, festive way.
Frequently Asked Questions
Can I use regular chocolate instead of candy melts?
Yes, you can melt regular chocolate, but it may not set as firmly as candy melts. Consider adding a bit of shortening to help with consistency.
Can I make these in advance?
Absolutely! You can prepare them a few days ahead of time and store them correctly.
How do I prevent melting the candy melts?
Always melt at a low power in the microwave and stir frequently. If using a double boiler, keep the heat low.
What is the best way to store leftover pretzels?
Store them in an airtight container at room temperature to maintain freshness and texture.
Can I add food coloring to the candy melts?
Yes, but be careful not to add too much. Gel food coloring works best, as it doesn’t affect the melting process.
Final Thoughts
Chocolate Covered Halloween Pretzels are a delightful blend of sweet and salty flavors that are easy to make and sure to impress at any gathering. With their festive appearance and customizable toppings, they can become a favorite treat for both kids and adults alike. Try making these pretzels for your next Halloween celebration; they’re bound to be a hit!
PrintChocolate Covered Halloween Pretzels
Delightfully fun and easy-to-make chocolate covered pretzels, perfect for Halloween celebrations.
- Prep Time: 15 minutes
- Cook Time: 10 minutes
- Total Time: 25 minutes
- Yield: 12 pretzels
- Category: Dessert
- Method: No Bake
- Cuisine: American
- Diet: Vegetarian
Ingredients
- Pretzel Rods
- Candy Melts (any color, preferably Halloween colors)
- Holiday Sprinkles
- Candy Corn (optional)
Instructions
- Melt the Candy Melts according to package instructions in a microwave-safe bowl until smooth.
- Dip the Pretzel Rods into the melted candy, ensuring they are fully coated, and swirl to remove excess.
- Arrange the coated pretzels on a parchment-lined baking sheet without them touching.
- Add your favorite toppings while the candy coating is still wet.
- Cool completely at room temperature until the candy hardens.
Notes
Experiment with toppings and chocolate drizzles for a creative twist.












