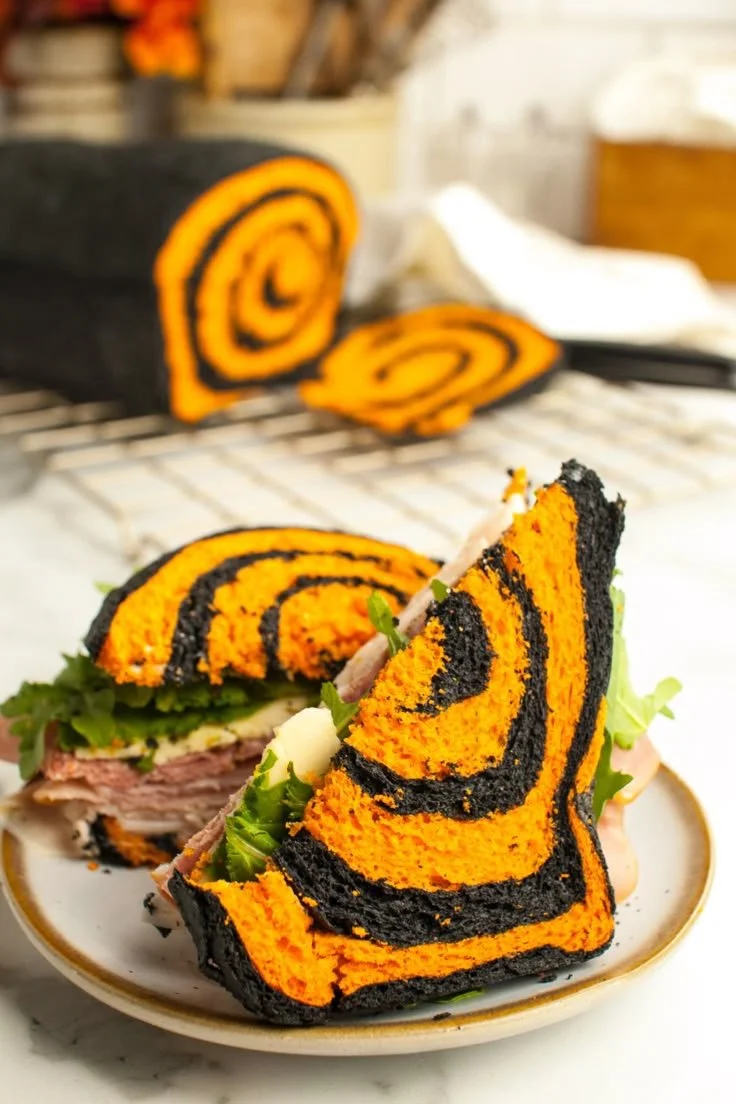
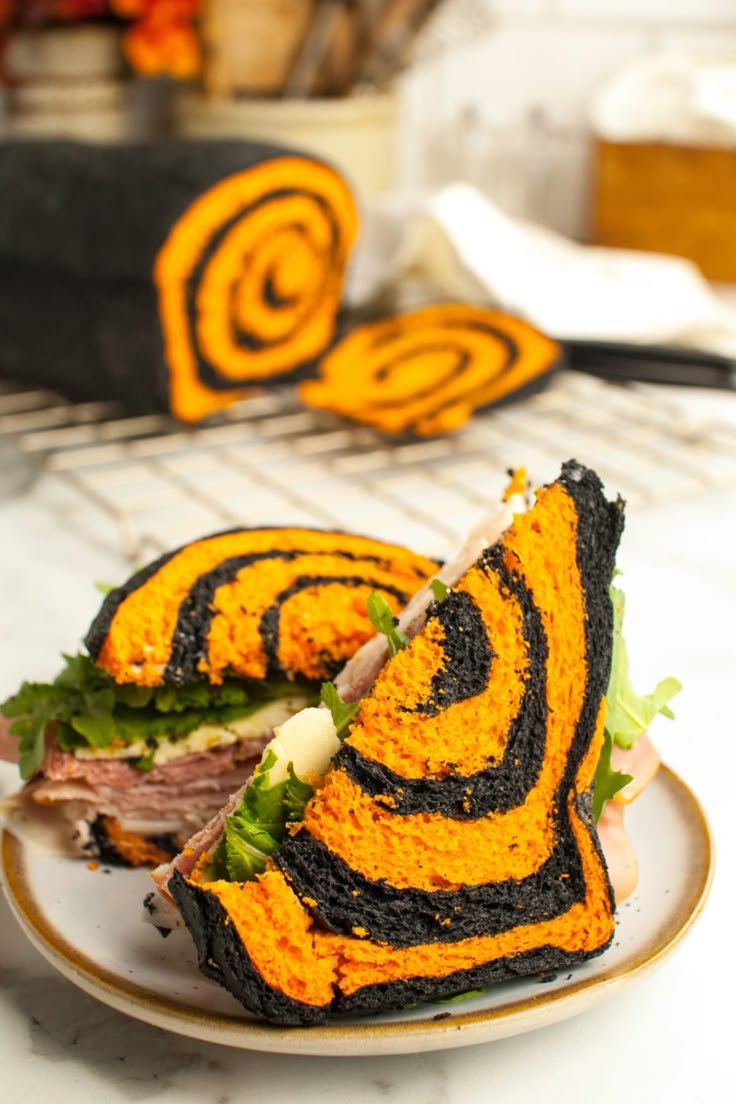
The vibrant Spooky Halloween Bread recipe is perfect for bringing some festive fun to your table. Whether you’re hosting a Halloween party or just looking to impress the kids, this colorful bread is a delightful treat that will add a touch of whimsy to your celebrations. It’s not only visually stunning but also incredibly easy to make, making it a wonderful baking project for beginners and seasoned bakers alike.
Why You’ll Love Spooky Halloween Bread
- Fun and Festive: This bread bursts with color and creativity, making it a hit for Halloween gatherings.
- Easy to Make: With simple steps and common ingredients, even novice bakers can bring this treat to life.
- Customizable: You can choose your favorite colors and flavors to add a personal touch.
- Unique Presentation: The vibrant layers create a stunning visual appeal that’s perfect for social media sharing.
- Family-Friendly Activity: Baking this bread can be a fun family project that encourages teamwork and creativity.
Recipe Overview
- Prep Time: 25 minutes
- Cook Time: 30 minutes
- Total Time: 55 minutes
- Servings: 10 slices
- Difficulty Level: Easy
Ingredients You’ll Need for Spooky Halloween Bread
- Bread Base:
- 3 cups all-purpose flour
- This is the main structure of your bread.
- 1 packet (2 ¼ tsp) instant yeast
- Provides the leavening for a light and fluffy texture.
- ½ cup sugar
- Sweetens the bread and enhances browning.
- 1 tsp salt
- Balances the sweetness and enhances flavors.
- 1 cup warm milk
- Activates the yeast and adds moisture.
- ¼ cup unsalted butter, melted
- Contributes to the soft texture and rich flavor.
- 3 cups all-purpose flour
- Coloring and Flavoring:
- Food coloring (orange, purple, green, and black)
- Adds vibrant, festive colors. Gel food coloring works best.
- Optional: A splash of vanilla extract or almond extract for a flavor twist.
- Food coloring (orange, purple, green, and black)
How to Make Spooky Halloween Bread
-
Prepare the Yeast Mixture
In a mixing bowl, combine warm milk, sugar, and instant yeast. Allow it to sit for about 5 minutes until bubbly. -
Mix the Dough
Add the melted butter, flour, and salt to the yeast mixture. Mix until a dough forms. -
Knead the Dough
Knead the dough on a floured surface for about 5-7 minutes until it’s smooth and elastic. If the dough is sticky, sprinkle a bit more flour. -
Let It Rise
Place the dough in a greased bowl, cover it with a damp cloth, and let it rise in a warm place for about 1 hour, or until doubled in size. -
Color the Dough
Once risen, divide the dough into four equal pieces. Color each piece with a different food coloring, kneading the dough until the color is evenly distributed. -
Shape the Bread
Roll each colored dough piece into strands. Braid the strands together, alternating colors to create a visually appealing pattern. -
Second Rise
Place the braided dough into a greased loaf pan. Cover it again and let it rise for another 30 minutes. -
Bake
Preheat the oven to 350°F (175°C). Bake the bread for 25-30 minutes, or until golden brown. An internal temperature of 190°F (88°C) is ideal for bread. -
Cool and Enjoy
Allow the bread to cool in the pan for 10 minutes, then transfer it to a wire rack to cool completely before slicing.
Tips for Success
- Consistency Matters: Ensure your dough is not too dry. If it feels hard, add a bit more warm milk.
- Watch the Oven: Each oven is different, so keep an eye on the bread towards the end of baking to avoid over-browning.
- Flavor Enhancements: A touch of vanilla or almond extract can elevate the flavor of your bread.
- Room Temperature Ingredients: Always use room temperature ingredients for the best rise.
- Easy Cleanup: Use parchment paper in the loaf pan for easier removal and cleanup.
Easy Variations
- Flavored Bread: Add ingredients like shredded coconut or spices (like cinnamon) for an extra layer of flavor.
- Swirl Filling: Incorporate a swirl of chocolate or Nutella by spreading it on the dough before rolling it into strands.
- Mini Breads: Instead of one large loaf, make several mini loaves for individual servings.
- Festive Shapes: Use cookie cutters to shape the dough instead of braiding for playful designs.
What to Serve with Spooky Halloween Bread
- Pumpkin Soup: The warm, savory flavor pairs beautifully with the sweet bread.
- Cheese Board: A selection of creamy cheeses complements the sweetness of the bread.
- Autumn Salads: A fresh salad with vibrant autumn vegetables offers a nice contrast.
- Hot Chocolate: This bread is deliciously dipped in warm beverages for a cozy treat.
Storage and Reheating
- Refrigerator Storage: Store leftover bread in an airtight container in the fridge for up to 4 days.
- Freezer Storage: Wrap slices tightly in plastic wrap and foil, then freeze for up to 3 months.
- Reheating: Warm slices in the toaster or oven to restore freshness, avoiding a microwave to preserve texture.
Common Mistakes to Avoid
- Over-Kneading the Dough: This can lead to tough bread; knead just until smooth.
- Inaccurate Measurements: Use a kitchen scale for precise measurements if possible, particularly for flour.
- Skipping the Rise Time: Allowing the dough to rise adequately is crucial for texture; don’t rush this step.
Spooky Halloween Bread: Background & Cultural Inspiration
The tradition of baking bread goes back centuries, with various cultures exploring unique recipes to celebrate festivals. Halloween-inspired baking brings a fun twist to this age-old craft, allowing bakers to be creative with colors and shapes. The festive nature of this bread can be traced back to the idea of celebrating harvest and community gatherings, making it a perfect addition to modern Halloween festivities.
Frequently Asked Questions
Can I make gluten-free Spooky Halloween Bread?
Yes! Substitute the all-purpose flour with a gluten-free blend, ensuring it contains xanthan gum for better structure.
How can I make this bread ahead of time?
You can prepare the dough and let it rise in the fridge overnight for better flavor development.
What if my bread doesn’t rise?
Make sure your yeast is fresh and use warm, but not hot, milk to activate the yeast.
Can I use milk alternatives in this recipe?
Yes, almond milk or oat milk works as a suitable substitute for dairy milk.
How do I ensure my bread is perfectly baked?
Use a thermometer to check if the internal temperature reaches 190°F (88°C), signaling it’s fully baked.
Final Thoughts
Making Spooky Halloween Bread is not just a fun baking project; it’s an opportunity to create lasting memories. Its vibrant colors and delightful taste make it an ideal treat for Halloween or any festive gathering. Whether enjoyed as a family activity or shared with friends, this recipe promises smiles and satisfaction. Try it out and let your creativity run wild!
PrintSpooky Halloween Bread

This vibrant bread is perfect for Halloween celebrations, easy to make, and customizable with your favorite colors and flavors.
- Prep Time: 25 minutes
- Cook Time: 30 minutes
- Total Time: 55 minutes
- Yield: 10 slices
- Category: Bakery
- Method: Baking
- Cuisine: American
- Diet: Vegetarian
Ingredients
- 3 cups all-purpose flour
- 1 packet (2 ¼ tsp) instant yeast
- ½ cup sugar
- 1 tsp salt
- 1 cup warm milk
- ¼ cup unsalted butter, melted
- Food coloring (orange, purple, green, and black)
- Optional: splash of vanilla extract or almond extract
Instructions
- Prepare the yeast mixture by combining warm milk, sugar, and instant yeast. Allow it to sit for about 5 minutes until bubbly.
- Mix the dough by adding the melted butter, flour, and salt to the yeast mixture. Mix until a dough forms.
- Knead the dough on a floured surface for about 5-7 minutes until smooth and elastic.
- Let it rise in a greased bowl, covered with a damp cloth, in a warm place for about 1 hour, or until doubled in size.
- Color the dough by dividing it into four pieces and adding different food coloring to each.
- Shape the bread by rolling each colored piece into strands and braiding them together.
- Second rise in a greased loaf pan for another 30 minutes.
- Bake in a preheated oven at 350°F (175°C) for 25-30 minutes until golden brown.
- Cool in the pan for 10 minutes, then transfer to a wire rack to cool completely before slicing.
Notes
Ensure the dough is not too dry. Use room temperature ingredients for the best rise.












