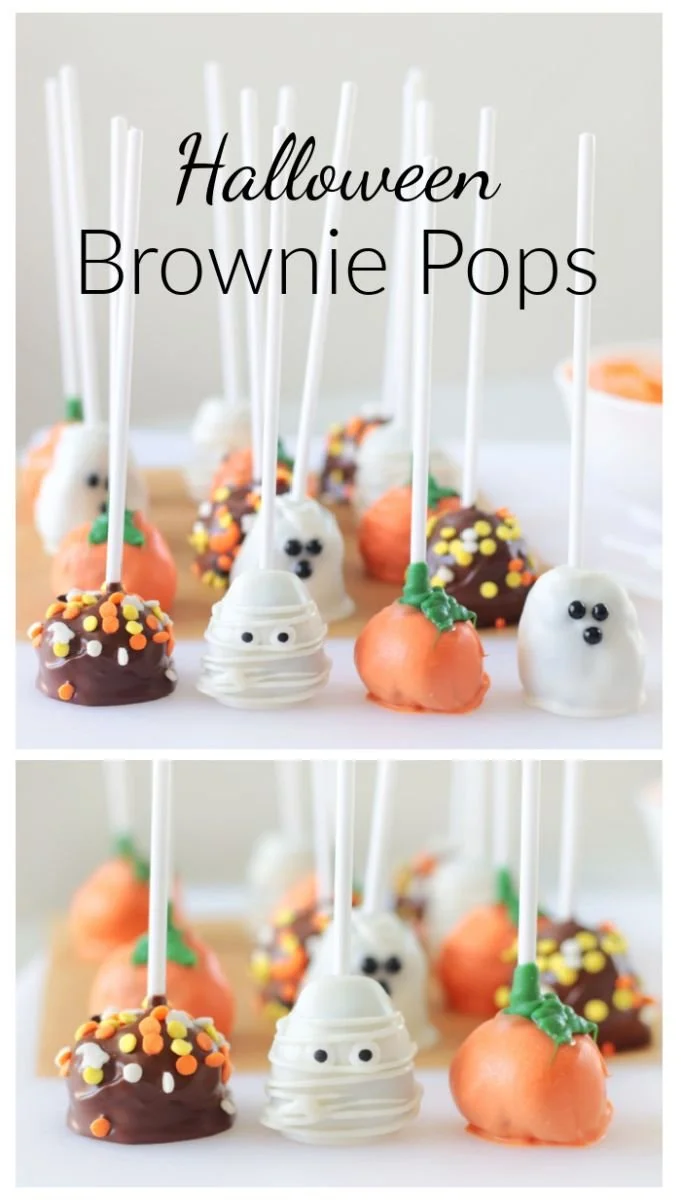
You’ll love making these Spooky Halloween Brownie Pops because they are not only fun and festive but also incredibly easy to prepare. Perfect for parties or as treats for trick-or-treaters, these adorable pops will delight both kids and adults alike. With just a few simple ingredients and steps, you can create these delightful treats in no time.
Why You’ll Love Spooky Halloween Brownie Pops
- Easy to Make: Even beginner cooks can succeed with this straightforward recipe that requires minimal ingredients.
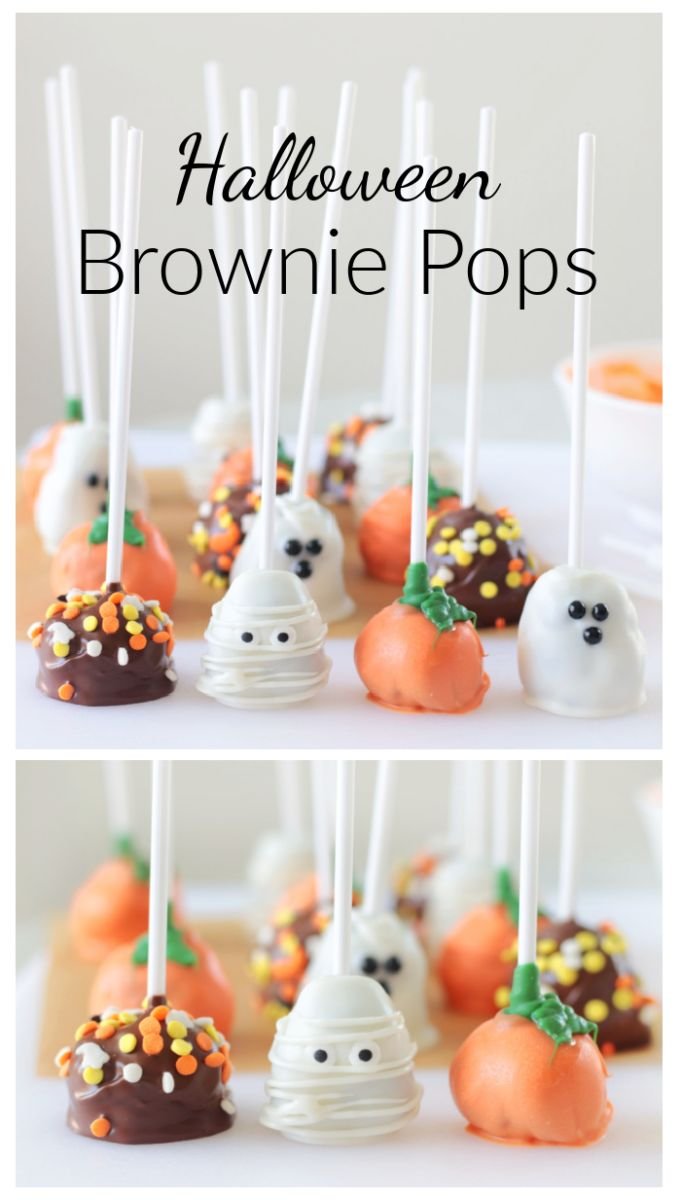
- Customizable Designs: Get creative with decorations, turning brownie pops into ghosts, mummies, and pumpkins to suit your Halloween theme.
- Perfect for Parties: These pops make a fun and shareable treat, ideal for Halloween gatherings or school events.
- No Baking Required: Using store-bought brownies means you skip the baking step, saving time and effort.
- Delicious and Decadent: Rich brownies combined with melted chocolate create a delightful contrast in flavor and texture that everyone will love.
Recipe Overview
- Prep Time: 15 minutes
- Chill Time: 30 minutes
- Total Time: 45 minutes
- Servings: 12 pops
- Difficulty Level: Easy
Ingredients You’ll Need for Spooky Halloween Brownie Pops
-
Brownie Base:
- 1 batch of fresh brownies (store-bought or homemade)
-
Coating and Decorations:
- Lollipop sticks
- 1 cup white chocolate or candy melts (for ghost and mummy)
- 1 cup orange chocolate or candy melts (for pumpkins)
- Edible decorations (like candy eyes or sprinkles)
Notes:
- Using store-bought brownies allows for quick assembly, but homemade brownies can be used for a personal touch.
- Candy melts and chocolate make for a smooth coating; each option delivers great flavors but varies in color and intensity. Consider using your favorite brands for the best results.
How to Make Spooky Halloween Brownie Pops
-
Crumble the Brownies: In a large bowl, crumble the fresh brownies into fine pieces using your hands or a fork. Ensure the mixture is uniform for better shaping.
-
Shape into Balls: Take small portions of the brownie mixture and roll them into 1-inch balls. Press gently to maintain their shape.
-
Insert Lollipop Sticks: Insert a lollipop stick into each brownie ball, placing them upright on a baking sheet lined with parchment paper.
-
Chill to Set: Place the baking sheet in the refrigerator for 15-30 minutes to help the brownie pops firm up.
-
Melt the Chocolate: Melt the white chocolate or candy melts in a microwave-safe bowl using 30-second intervals, stirring in between, until smooth.
-
Dip the Pops: Dip each chilled brownie pop into the melted chocolate, allowing excess chocolate to drip off back into the bowl.
-
Add Decorations for Mummies: For mummy pops, drizzle additional melted white chocolate on top for ‘bandages’ and immediately place candy eyes before the chocolate hardens.
-
Create Ghosts: For ghost pops, simply dip in the melted white chocolate and add candy eyes to complete the look.
-
Pumpkin Pops: For pumpkin pops, dip brownie balls in melted orange chocolate and use melted green chocolate or fondant to create stems.
-
Final Set: Allow all decorated pops to harden completely at room temperature or return to the fridge for quicker setting.
Tips for Success
- Uniform Size: Ensure that brownie balls are evenly sized for consistent melting and decoration.
- Cool Chocolate: If the melted chocolate is too hot, it may cause the brownie to fall apart; let it cool slightly before dipping.
- Decoration Timing: Work quickly when adding decorations to the chocolate-covered pops to ensure they stick properly.
- Consistent Mixing: Crumble the brownies thoroughly to create a smooth mixture that holds together better.
Easy Variations
- Chocolate Coating: Use milk or dark chocolate instead of white chocolate or orange melts for a different flavor profile.
- Different Shapes: Instead of round pops, shape the brownie mixture into Halloween-themed designs, such as bats or spiders.
- Flavor Infusion: Add a teaspoon of peppermint extract to the melted chocolate for a minty twist.
- Non-Dairy Option: Use vegan chocolate and brownies for a dairy-free version of these pops.
What to Serve with Spooky Halloween Brownie Pops
- Hot Cocoa: A warm, creamy drink pairs nicely with sweet brownie pops, bringing cozy vibes.
- Fall Fruit Salad: A refreshing mix of apples, pears, and pomegranate seeds can balance the richness of the brownie pops.
- Caramel Sauce: Serve on the side for dipping, adding an extra layer of indulgence.
- Chewy Halloween Cookies: Complement the brownie pops with an assortment of cookies shaped like ghosts or pumpkins for variety.
Storage and Reheating
- Refrigerator Storage: Store leftover brownie pops in an airtight container in the fridge for up to 5 days.
- Freezer Storage: For longer storage, freeze the pops once they are fully set. Wrap each pop individually in plastic wrap and keep them in a freezer-safe container for up to 2 months.
- Reheating Method: If served from frozen, let them thaw in the fridge overnight before enjoying to maintain their texture.
Common Mistakes to Avoid
- Overmixing Brownies: Excessive handling can cause the mixture to become too wet and challenging to shape.
- Skipping Chill Time: Not allowing the brownie pops to chill can lead to them falling apart during dipping.
- Too Hot Chocolate: Dipping in overly hot melted chocolate can melt the brownie balls, creating a messy situation.
- Neglecting Decorations: Missing the decoration timing can make the pops look less festive and appealing.
Spooky Halloween Brownie Pops: Background & Cultural Inspiration
Spooky Halloween Brownie Pops are inspired by the festive spirit of Halloween when people enjoy sharing creative treats. Halloween allows families to come together, expressing creativity through food as they celebrate and indulge in spooky-themed recipes. These brownie pops not only tickle the taste buds but also spark joy and laughter among friends and family during Halloween festivities.
Frequently Asked Questions
Can I use leftover brownies for this recipe?
Absolutely! This recipe works wonderfully with leftover brownies from a previous baking session.
How do I store leftover brownie pops?
Store them in an airtight container in the fridge for up to 5 days, or freeze them for longer shelf life.
Can I make these brownie pops in advance?
Yes, they can be made a day or two in advance and stored in the fridge. Just allow them to set completely before packaging them away.
What can I use instead of lollipop sticks?
If you don’t have lollipop sticks, you can use sturdy pretzel sticks or even bamboo skewers cut to size.
How can I make them gluten-free?
Use gluten-free brownies and ensure that the other ingredients (like candy) are also certified gluten-free to maintain the integrity of the recipe.
Final Thoughts
Spooky Halloween Brownie Pops are a delightful and easy treat that you’ll enjoy making and sharing. Their playful designs and rich flavors make them a highlight of any Halloween celebration. So gather the ingredients, have fun decorating, and create memorable moments with these charming pops!
PrintSpooky Halloween Brownie Pops
Fun and festive brownie pops that are easy to make and perfect for Halloween parties.
- Prep Time: 15 minutes
- Cook Time: 0 minutes
- Total Time: 45 minutes
- Yield: 12 pops
- Category: Dessert
- Method: No Bake
- Cuisine: American
- Diet: Vegetarian
Ingredients
- 1 batch of fresh brownies (store-bought or homemade)
- Lollipop sticks
- 1 cup white chocolate or candy melts (for ghost and mummy)
- 1 cup orange chocolate or candy melts (for pumpkins)
- Edible decorations (like candy eyes or sprinkles)
Instructions
- Crumble the brownies into fine pieces using your hands or a fork.
- Shape small portions into 1-inch balls.
- Insert a lollipop stick into each brownie ball.
- Chill the baking sheet in the refrigerator for 15-30 minutes.
- Melt the white chocolate or candy melts in a microwave-safe bowl.
- Dip each chilled brownie pop into the melted chocolate.
- Add decorations for mummies, ghosts, or pumpkins as desired.
- Allow all decorated pops to harden completely.
Notes
Using store-bought brownies allows for quick assembly, but homemade brownies can provide a personal touch. Let melted chocolate cool slightly before dipping to prevent brownies from falling apart.












