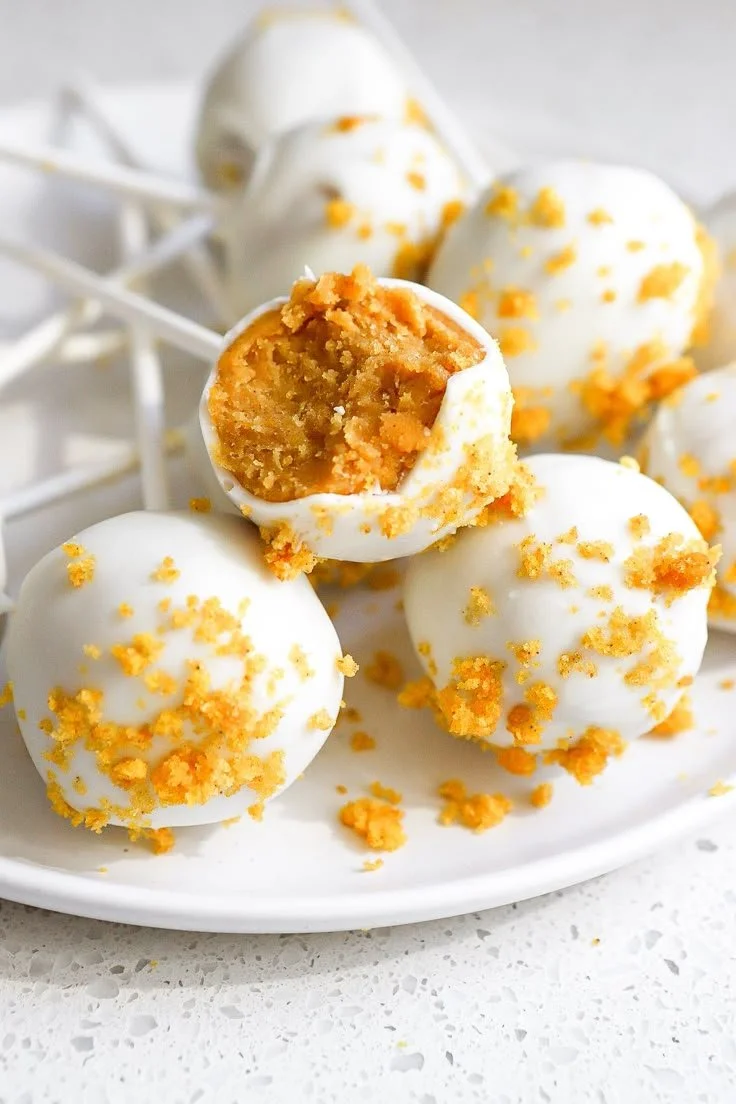
Pumpkin Cake Pops are a delightful treat that perfectly capture the essence of fall. These sweet bites are easy to make and are sure to impress at any gathering, whether it’s a Halloween party or a festive autumn celebration. With their rich pumpkin flavor and fun appearance, they’re a hit with both kids and adults alike.
Why You’ll Love Pumpkin Cake Pops
- Simple to Make: Even beginner cooks can tackle this recipe with ease, making it an excellent choice for anyone looking to dive into baking.
- Perfect for Fall: With pumpkin puree and warm spices, these cake pops celebrate the flavors of the season beautifully.
- Customizable Toppings: You can get creative with decorations, like chocolate coatings or festive sprinkles, to match any occasion.
- Great for Parties: These cute, portable treats are perfect for sharing at gatherings, ensuring everyone can enjoy a bite-sized dessert.
- Fun to Decorate: Involve friends or family in the decorating process, turning it into a fun activity that everyone can enjoy.
Recipe Overview
- Prep Time: 15 minutes
- Cook Time: 30 minutes
- Total Time: 45 minutes
- Servings: 12 cake pops
- Difficulty Level: Easy
Ingredients You’ll Need for Pumpkin Cake Pops
-
Wet Ingredients:
- 1 cup pumpkin puree
- 1/2 cup sugar
- 1/4 cup vegetable oil
- 2 large eggs
- 1 teaspoon vanilla extract
-
Dry Ingredients:
- 1 1/2 cups all-purpose flour
- 1 teaspoon baking powder
- 1/2 teaspoon baking soda
- 1/2 teaspoon salt
- 1 teaspoon ground cinnamon
- 1/2 teaspoon ground nutmeg
-
For Coating:
- 1/4 cup melting chocolate or candy coating
- Sprinkles (optional)
Notes:
- Pumpkin Puree: Be sure to use pure pumpkin puree, not pumpkin pie filling, for the best flavor and consistency.
- Sprinkles: These are great for adding a festive touch, especially during Halloween or fall-themed events.
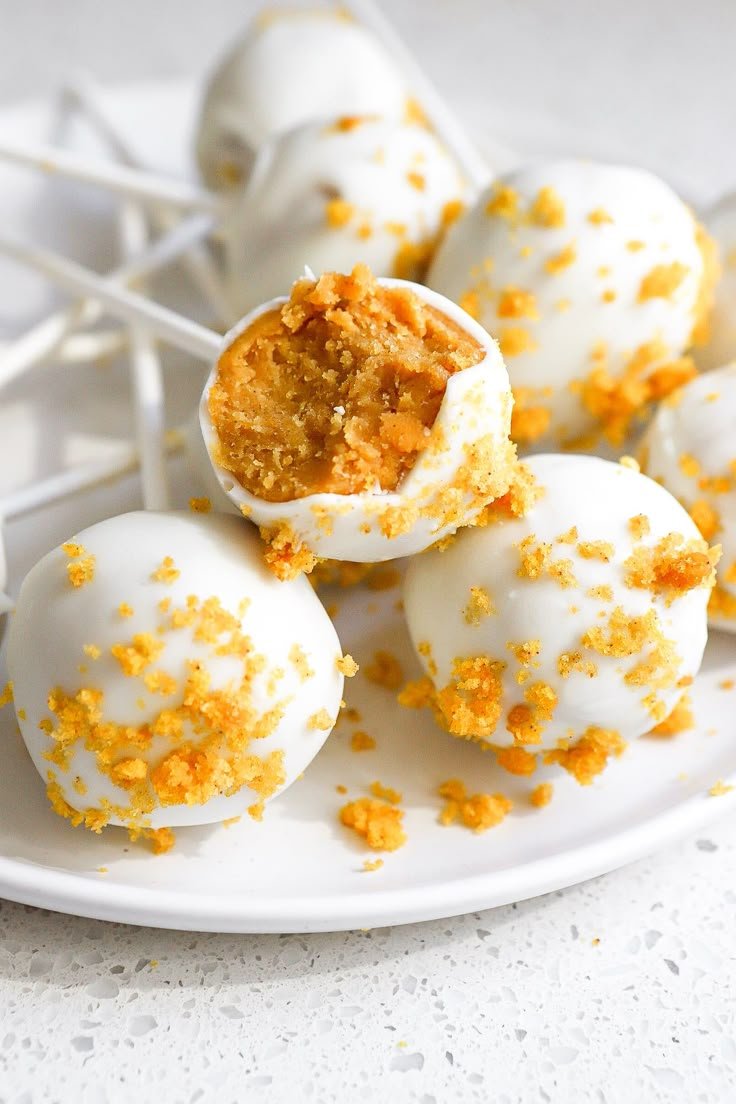
How to Make Pumpkin Cake Pops
-
Combine Wet Ingredients: In a large bowl, mix the pumpkin puree, sugar, vegetable oil, eggs, and vanilla extract until the mixture is smooth and well combined.
-
Mix Dry Ingredients: In another bowl, whisk together the flour, baking powder, baking soda, salt, cinnamon, and nutmeg. Make sure there are no lumps for a consistent texture.
-
Combine Mixtures: Gradually add the dry ingredients to the wet ingredients, mixing just until the batter is combined. Avoid overmixing to keep the cake pops light and tender.
-
Shape the Cake Pops: Scoop out small portions of the batter and roll them into balls, about 1 inch in diameter. This process can get a little messy, so feel free to dust your hands with flour if needed.
-
Freeze the Cake Pops: Place the shaped cake pops on a baking sheet lined with parchment paper and freeze for about 30 minutes. This helps them hold their shape when dipping.
-
Melt the Coating: Melt the chocolate or candy coating in a microwave-safe bowl or double boiler until it’s smooth. Be careful not to overheat.
-
Prepare the Sticks: Dip the end of each lollipop stick into the melted coating, then insert it into the center of each cake pop. This helps hold the stick in place.
-
Dip the Cake Pops: Dip each cake pop into the melted coating, allowing any excess coating to drip off. You can use a gentle twisting motion to help the coating adhere and create a smooth finish.
-
Decorate: If desired, decorate the coating with sprinkles while it is still wet, so they stick well.
-
Cool: Let the cake pops cool completely on a stand or in a block of plastic foam to keep them upright while they set.
Tips for Success
- Chill Time: Ensure that the cake pops are properly frozen before dipping to prevent them from falling apart.
- Coating Consistency: If your chocolate or candy coating is too thick, you can add a small amount of vegetable oil to thin it out for easier dipping.
- Storage: Allow dipped cake pops to set completely before storing them in an airtight container to maintain their texture.
- Piping Tip: For more intricate designs, consider using a piping bag with a small tip to add decorations or drizzle on additional chocolate.
Easy Variations
- Flavor Adjustments: Swap out the spices for pumpkin pie spice for a different flavor profile.
- Nutty Crunch: Add chopped nuts like pecans or walnuts to the batter for added texture.
- Dairy-Free Option: Use a plant-based oil and dairy-free chocolate to make this recipe suitable for dairy-free diets.
- Frosting Filling: Inject some cream cheese frosting into the center of each cake pop for a surprise inside.
What to Serve with Pumpkin Cake Pops
- Hot Apple Cider: This warm beverage pairs perfectly with the fall flavors of the cake pops.
- Vanilla Ice Cream: A scoop of vanilla ice cream adds creaminess that complements the sweet and spicy cake pops.
- Cheese Board: Include a cheese board with tangy cheeses for a delightful contrast to the sweet cake pops.
- Hot Chocolate: Serve these alongside a steaming mug of hot chocolate for a cozy treat.
Storage and Reheating
- Refrigerator Storage: Store your cake pops in an airtight container in the refrigerator for up to one week.
- Freezer Storage: For longer storage, freeze the uncoated cake pops in a container for up to three months. Just coat them once thawed.
- Reheating Method: There’s no need to reheat cake pops, as they are best enjoyed chilled or at room temperature.
- Meal Prep Note: You can prep the cake pops in advance and freeze them before coating, allowing for quick assembly when needed.
Common Mistakes to Avoid
- Overmixing the Batter: Be careful not to overmix after adding the dry ingredients, as this can lead to dense cake pops.
- Dipping Temperature: Make sure the melted chocolate isn’t too hot, as it can melt the cake pop and make it collapse.
- Too Much Coating: Allow excess coating to drip off completely before setting; too much can create a heavy cake pop.
- Inadequate Freezing: Don’t skip the freezing step; it is crucial for the cake pops to hold their shape during dipping.
Pumpkin Cake Pops: Background & Cultural Inspiration
Pumpkin cake pops are a fun twist on traditional cake pops, drawing inspiration from classic pumpkin desserts enjoyed during the fall season. Originating from the U.S., pumpkin has been incorporated into various culinary traditions, particularly around Halloween and Thanksgiving. The use of pumpkin in desserts dates back to early American history, where the harvest season was celebrated with rich, spiced treats. These cake pops serve not only as a tasty dessert but also as a festive nod to the warmth and joy of fall gatherings.
Frequently Asked Questions
Can I use fresh pumpkin instead of canned?
Yes, you can use fresh pumpkin by baking and pureeing it, but canned pumpkin puree saves time and ensures the right texture.
How can I make these cake pops gluten-free?
Substitute the all-purpose flour with a gluten-free flour blend to maintain the proper texture.
How long do cake pops last?
Stored in the refrigerator, they will last about a week, while freezer-stored cake pops can last three months.
Can I prepare cake pops ahead of time?
Absolutely! You can make the cake batter and shape the pops in advance, then freeze them until you are ready to coat them.
What can I substitute for the vegetable oil?
You can substitute melted coconut oil or unsweetened applesauce for a healthier option.
Final Thoughts
Pumpkin Cake Pops are not only a delightful and festive treat but also a fun way to embrace the flavors of the fall season. Their ease of preparation and customizable nature make them perfect for gatherings or quiet family nights. Try making these charming desserts this autumn, and you’ll be surprised at how quickly they disappear.
PrintPumpkin Cake Pops
Delightful pumpkin cake pops that capture the essence of fall, easy to make, and perfect for gatherings.
- Prep Time: 15 minutes
- Cook Time: 30 minutes
- Total Time: 45 minutes
- Yield: 12 cake pops
- Category: Dessert
- Method: Baking
- Cuisine: American
- Diet: Vegetarian
Ingredients
- 1 cup pumpkin puree
- 1/2 cup sugar
- 1/4 cup vegetable oil
- 2 large eggs
- 1 teaspoon vanilla extract
- 1 1/2 cups all-purpose flour
- 1 teaspoon baking powder
- 1/2 teaspoon baking soda
- 1/2 teaspoon salt
- 1 teaspoon ground cinnamon
- 1/2 teaspoon ground nutmeg
- 1/4 cup melting chocolate or candy coating
- Sprinkles (optional)
Instructions
- Combine Wet Ingredients: In a large bowl, mix the pumpkin puree, sugar, vegetable oil, eggs, and vanilla extract until the mixture is smooth and well combined.
- Mix Dry Ingredients: In another bowl, whisk together the flour, baking powder, baking soda, salt, cinnamon, and nutmeg. Make sure there are no lumps for a consistent texture.
- Combine Mixtures: Gradually add the dry ingredients to the wet ingredients, mixing just until the batter is combined. Avoid overmixing to keep the cake pops light and tender.
- Shape the Cake Pops: Scoop out small portions of the batter and roll them into balls, about 1 inch in diameter.
- Freeze the Cake Pops: Place the shaped cake pops on a baking sheet lined with parchment paper and freeze for about 30 minutes.
- Melt the Coating: Melt the chocolate or candy coating in a microwave-safe bowl or double boiler until it’s smooth.
- Prepare the Sticks: Dip the end of each lollipop stick into the melted coating, then insert it into the center of each cake pop.
- Dip the Cake Pops: Dip each cake pop into the melted coating, allowing any excess coating to drip off.
- Decorate: If desired, decorate with sprinkles while the coating is still wet.
- Cool: Let the cake pops cool completely on a stand or in a block of plastic foam to keep them upright while they set.
Notes
Use pure pumpkin puree, not pumpkin pie filling, for the best flavor.












