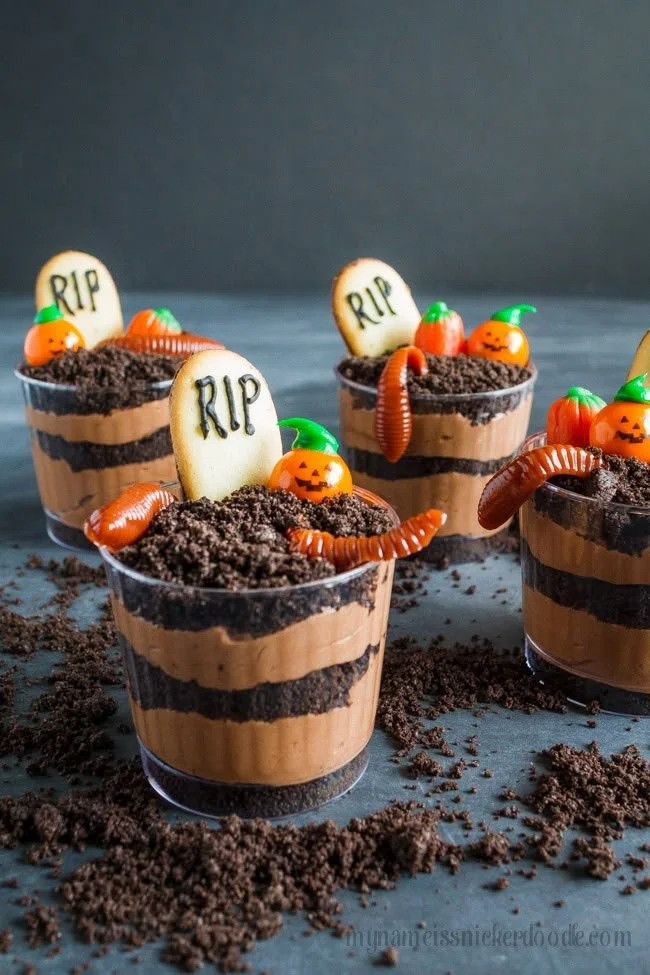
Chocolate Pudding Graveyard Cookie Cups are the perfect spooky treat for Halloween gatherings. This simple and fun recipe combines creamy chocolate pudding, crushed Oreo cookies, and festive candy decorations to create an inviting dessert everyone will love. Not only are these cups visually appealing, but they’re also easy to assemble, making them a great choice for both beginners and seasoned bakers alike.
Why You’ll Love Chocolate Pudding Graveyard Cookie Cups
- Easy Assembly: This recipe requires no baking, making it perfect for kids and novice chefs. Just layer and decorate, and you’re done!
- Fun and Festive: With the Halloween theme, these dessert cups are a hit at parties and gatherings, adding a playful touch to your dessert table.
- Customizable: You can modify the toppings and decorations to suit your preferences or to use up leftover candies.
- Decadently Delicious: Each cup combines rich chocolate flavors with the crunch of Oreos, creating a delightful texture contrast.
- Perfect for Meal Prep: You can prepare these dessert cups in advance, making them a fantastic option for busy schedules or last-minute events.
Recipe Overview
- Prep Time: 15 minutes
- Cook Time: 0 minutes
- Total Time: 15 minutes (plus chilling time if desired)
- Servings: 4 servings
- Difficulty Level: Easy
Ingredients You’ll Need for Chocolate Pudding Graveyard Cookie Cups
- 1 box chocolate pudding mix: Use any brand of instant chocolate pudding for a quick and creamy base.
- 6 Oreo cookies: Crushed to form the bottom layer; you can substitute with gluten-free Oreos if needed.
- Gummy worms (about 10): For decoration, these add a creepy touch.
- Candy pumpkins (10-12): These help create the graveyard effect, but any Halloween-themed candy can work.
- Whipped cream: For topping; store-bought or homemade works great.
- Plastic cups (8 oz): Use clear plastic cups to showcase the layers for a more appealing presentation.
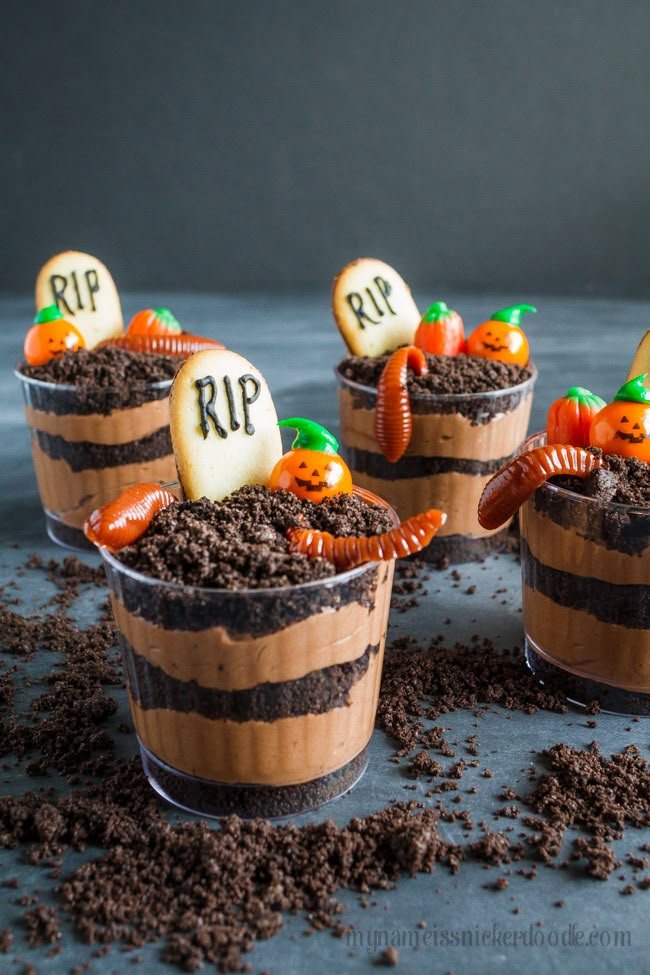
How to Make Chocolate Pudding Graveyard Cookie Cups
-
Prepare the Oreos: Crush the Oreo cookies into fine crumbs. You can do this by placing them in a zip-top bag and using a rolling pin or pulsing them in a food processor.
-
Make the Chocolate Pudding: In a mixing bowl, prepare the chocolate pudding according to the package instructions. This usually involves mixing the pudding mix with cold milk until it thickens.
-
Layer the Cups: Spoon equal amounts of the crushed Oreos into the bottom of each plastic cup, creating a solid base.
-
Add the Pudding: Once the pudding is ready, pour it generously over the Oreo crumbs in each cup, filling them about two-thirds full.
-
Top with Whipped Cream: Add a dollop of whipped cream on top of the pudding layer. This will create a ‘dirt’ effect, mimicking the look of a graveyard.
-
Decorate with Candy: Place gummy worms and candy pumpkins on top of the whipped cream to complete the graveyard look.
-
Serve and Enjoy: These dessert cups are best enjoyed immediately but can be chilled for a little while to firm up further before serving.
Tips for Success
- Chill Time: Although this recipe doesn’t require oven time, letting the assembled cups chill in the fridge for at least 30 minutes can enhance the texture and flavor.
- Crushing Oreos: Ensure the Oreos are crushed well to create an even texture and prevent larger chunks from disrupting the layers.
- Pudding Consistency: Follow the package instructions exactly for the pudding to achieve the ideal creamy thickness.
- Serving: Consider using clear cups to highlight the layers, making them visually appealing for guests.
Easy Variations
- Flavor Swap: Try using vanilla pudding instead of chocolate for a lighter flavor, or mix in some peanut butter to the chocolate pudding for an extra twist.
- Swapped Cookies: Use graham crackers or chocolate wafer cookies instead of Oreos for a different base flavor.
- Seasonal Themes: For other holidays, you can swap out the candy decorations to match the season, using red candies for Valentine’s Day or pumpkins during the fall.
- Added Fruits: Enhance the cups with chopped fruits like bananas or strawberries layered under the pudding for a fruity twist.
What to Serve with Chocolate Pudding Graveyard Cookie Cups
- Halloween Cookies: Serve with themed cookies shaped like bats or ghosts for a fun dessert platter.
- Apple Slices: The fresh crunch of apple slices can balance the sweetness of the cups; serve them on the side with caramel dip.
- Ice Cream: Vanilla or chocolate ice cream can complement the pudding cup’s texture and richness.
- Brownies: Fudge brownies make a rich accompaniment, ideal for chocolate lovers.
Storage and Reheating
- Refrigerator Storage: Store assembled cups in the fridge for up to 3 days. Keep them covered to maintain freshness.
- Freezer Storage: Freezing is not recommended due to the whipped cream’s texture changing once thawed.
- Preserve Texture: Avoid adding the decorations (gummy worms and candy pumpkins) until you are ready to serve to ensure they stay fresh and maintain their appearance.
Common Mistakes to Avoid
- Overmixing the Pudding: This can lead to a grainy texture. Mix until just incorporated and avoid long whisking times.
- Large Crumbs: Ensure Oreo crumbs are fine for better layering. Larger pieces may not hold their structure in the cups.
- Skipping the Chill Time: Don’t skip chilling time if you can. Letting the cups sit in the fridge brings the flavors together and improves the texture.
Chocolate Pudding Graveyard Cookie Cups: Background & Cultural Inspiration
Chocolate pudding is a classic dessert beloved by many. Its origins trace back to Europe, with roots in simple puddings made from milk, sugar, and starch. Over time, chocolate pudding evolved, gaining popularity for its rich, creamy texture that appeals to sweet-toothed individuals. The tradition of creating themed desserts around holidays like Halloween allows cooks of all skill levels to engage their creativity and share joy with friends and family. Combining the nostalgic taste of pudding with playful Halloween decorations encapsulates the spirit of festivities while remaining accessible and enjoyable.
Frequently Asked Questions
Can I use a different flavor of pudding?
Absolutely! Vanilla, butterscotch, or even cheesecake pudding can be delightful alternatives that add your personal twist.
How long can I store leftover cups?
Keep the cups in the refrigerator for up to 3 days. Just remember to hold off on adding any decorations until you’re ready to serve.
What can I substitute for gummy worms?
You can use any other candy, like chocolate spiders or Halloween sprinkles, to fit your festive theme.
Is it possible to make these in advance?
Yes, you can assemble the cups a day in advance and store them in the refrigerator. Toward serving time, simply add decorations as desired.
Can these cups be made dairy-free?
Certainly! Use dairy-free chocolate pudding and coconut whipped cream for a dairy-free alternative.
Final Thoughts
Chocolate Pudding Graveyard Cookie Cups are a delightful and visually striking dessert that’s easy to prepare for any Halloween gathering. You’ll enjoy creating this recipe as much as your guests will love eating it. They’re fun, delicious, and sure to bring smiles, making them a must-try for your next spooky celebration. So gather your ingredients and get ready to create this festive treat that perfectly embraces the spirit of Halloween!
PrintChocolate Pudding Graveyard Cookie Cups

A fun and spooky dessert combining creamy chocolate pudding, crushed Oreos, and festive candy for Halloween gatherings.
- Prep Time: 15 minutes
- Cook Time: 0 minutes
- Total Time: 15 minutes
- Yield: 4 servings
- Category: Dessert
- Method: No Bake
- Cuisine: American
- Diet: Vegetarian
Ingredients
- 1 box chocolate pudding mix
- 6 Oreo cookies, crushed
- 10 gummy worms
- 10-12 candy pumpkins
- Whipped cream
- 8 oz plastic cups
Instructions
- Prepare the Oreos: Crush the Oreo cookies into fine crumbs.
- Make the Chocolate Pudding: In a mixing bowl, prepare the chocolate pudding according to the package instructions.
- Layer the Cups: Spoon equal amounts of the crushed Oreos into the bottom of each plastic cup.
- Add the Pudding: Pour the pudding over the Oreo crumbs in each cup.
- Top with Whipped Cream: Add a dollop of whipped cream on top.
- Decorate with Candy: Place gummy worms and candy pumpkins on top.
- Serve and Enjoy: Best enjoyed immediately or chilled for a bit.
Notes
Chill the assembled cups for at least 30 minutes for improved texture and flavor. Avoid adding decorations until ready to serve.












