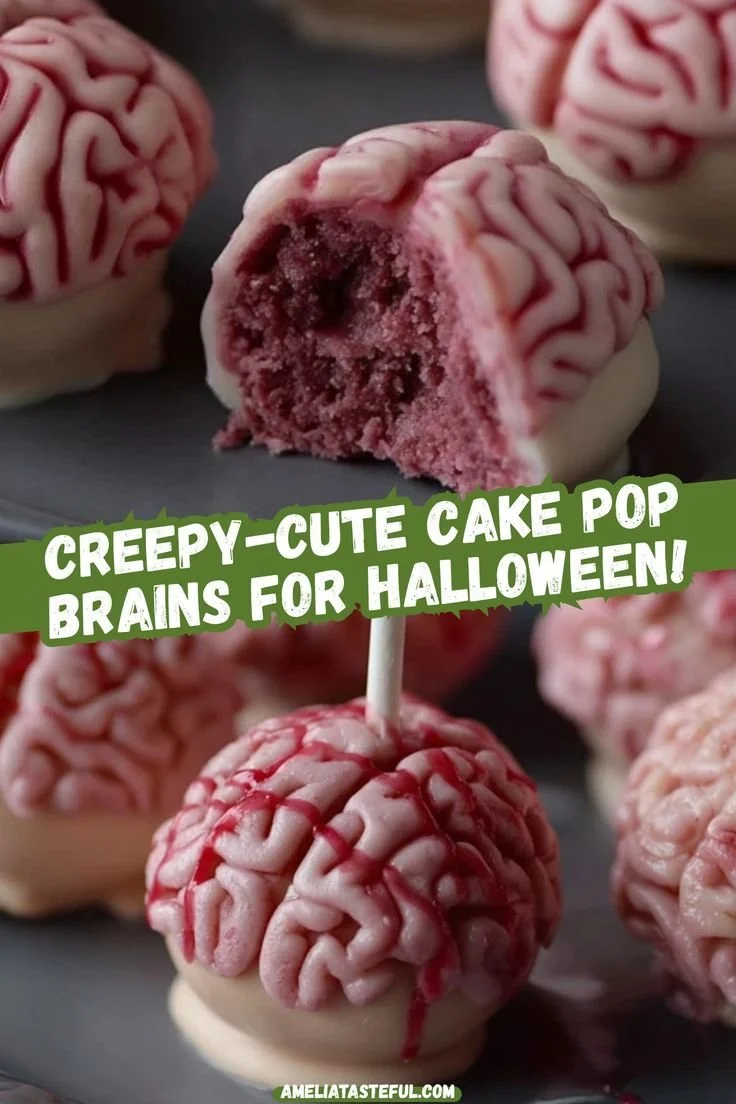
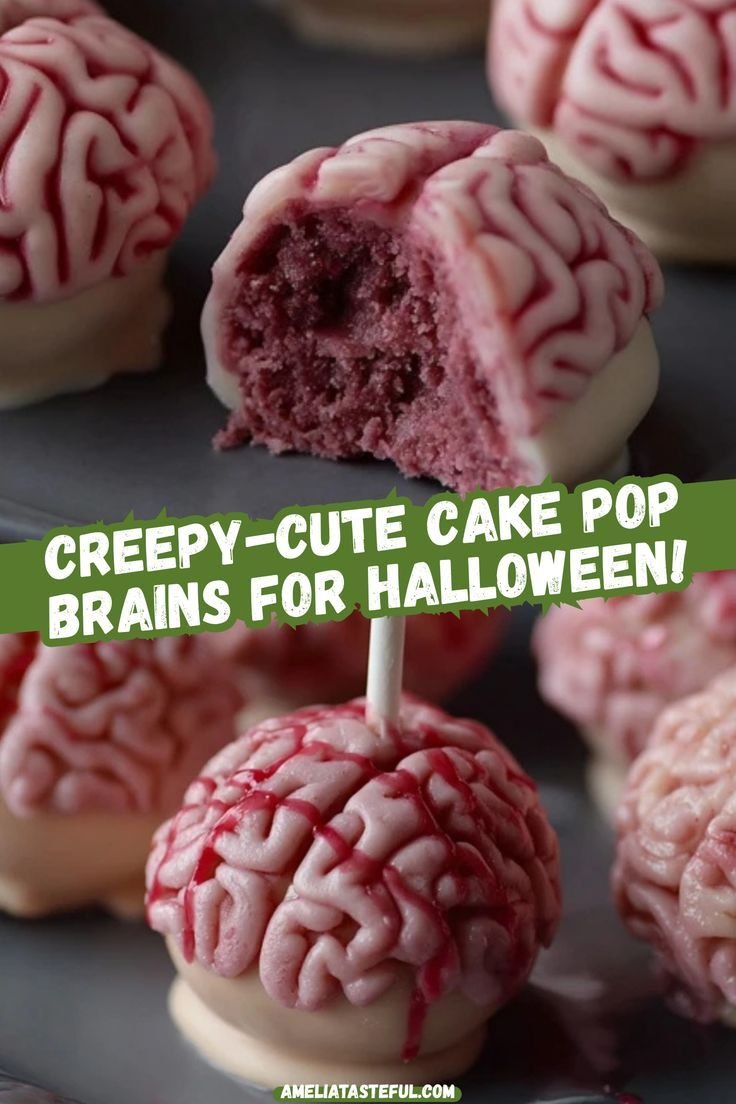
Ghoulishly delightful, Cake Pop Brains are the perfect sweet treat for Halloween or any spooky gathering. Not only do these cake pops look visually impressive, but they are also fun to make and enjoy with friends and family. With a combination of moist cake, creamy frosting, and vibrant colors, you’ll find this recipe is worth every bit of effort.
Why You’ll Love Cake Pop Brains
- Perfect for Halloween: These cake pops are an eye-catching addition to your Halloween festivities, making them an impressive treat that sparks conversation.
- Fun to Make: Involving kids or friends in the process of creating these spooky snacks makes for a memorable activity and a chance to showcase your creativity.
- Decadent Flavor: The combination of red velvet or chocolate cake with creamy frosting and a sweet candy coating adds depth of flavor that balances richness and sweetness.
- Customizable Design: You can easily adjust the colors and decoration to fit your theme, allowing for a personal touch whether it’s for Halloween or another event.
- Simple Ingredients: Most of the ingredients are common and easy to find, ensuring that you can whip these up even if you are a novice baker.
- Portable Treats: Cake pop brains are easy to transport, making them ideal for parties, school events, or holiday potlucks.
Recipe Overview
- Prep Time: 30 minutes
- Cook Time: 10 minutes (for melting the candy)
- Total Time: 40 minutes (plus chilling time)
- Servings: 12 to 15 cake pops
- Difficulty Level: Easy
Ingredients You’ll Need for Cake Pop Brains
-
Cake Mixture:
- 3–4 cups crumbled red velvet or chocolate cake
- ¼–½ cup vanilla or cream cheese frosting
-
Filling:
- ~½ cup seedless raspberry or cherry jam
- Red food coloring
-
Coating:
- 6–8 oz white candy melts or colored wafers (ruby, green, pink)
- Oil-based food coloring (pink and red)
-
Other:
- Lollipop sticks
- Silicone brain mold (or knife for hand shaping)
here
How to Make Cake Pop Brains
-
Prepare the Cake Mixture:
Start by crumbling your red velvet or chocolate cake into a large mixing bowl. Use your hands or a fork to break it into fine crumbs. Gradually mix in the frosting until the mixture holds together when squeezed. -
Shape the Brains:
If you’re using a silicone brain mold, firmly press the cake mixture into the mold, ensuring each cavity is filled evenly. If you’re shaping by hand, form oval shapes and create grooves with a knife to give them a brain-like appearance. -
Create the Shells:
Melt your candy coating according to package instructions. Brush a thin layer of the melted candy on the inside of the molds or shape it around your hand-formed cakes. Place in the fridge to chill until set. -
Add the Filling:
Mix the jam with a few drops of red food coloring until you achieve a vibrant color. Spoon a small amount into the center of each hardened candy shell. -
Fill with Cake Mixture:
Using the remaining cake mixture, fill the cavities or shape them into ovals again, smoothing the tops evenly. -
Seal:
Pour more melted candy over the top to seal the cake pop, smoothing it out as needed, then chill again until firm. -
Decorate:
Melt additional candy coating if required and pipe lines on top to mimic brain ridges. Use colorful sprinkles or designs to make them even creepier or more festive. -
Serve:
Once fully set, carefully unmold the cake pops and insert lollipop sticks. Arrange them on a serving platter to impress your guests.
Tips for Success
- Quality Ingredients: Use high-quality cake and frosting to enhance the overall flavor.
- Chill Between Steps: Make sure to chill the molds for the recommended time between coating and filling to ensure the candy sets correctly.
- Be Careful with Candies: Overheating your candy melts can cause them to seize. Melt in short intervals to avoid this.
- Experiment with Flavors: For an even more exciting treat, consider adding flavor extracts to your frosting or cake mix.
- Avoid Overfilling: When sealing with the candy coating, resist the urge to fill too high to prevent spills and uneven surfaces.
Easy Variations
- Chocolate Coating: Swap the white candy melts for dark chocolate for a richer flavor contrast.
- Mixed Fillings: Instead of just jam, incorporate different fillings like chocolate ganache or peanut butter for a surprise inside.
- Dairy-Free Version: Use dairy-free cake and vegan frosting to make these treats suitable for lactose-intolerant guests.
- Seasonal Colors: Add seasonal colorings based on upcoming holidays—orange for Halloween or green for St. Patrick’s Day.
- Custom Decorations: Use edible glitter or themed sprinkles to give your cake pops a unique flair based on the occasion.
What to Serve with Cake Pop Brains – Spooky & Sweet Halloween Treats
- Cider or Hot Chocolate: A rich beverage complements the sweetness of the cake pops, adding warmth to Halloween gatherings.
- Fruit Platter: Fresh fruits add a refreshing balance to the sugary treats, making your dessert spread more diverse.
- Meringue Ghosts: Light and airy, these would provide a different texture and fit well within the spooky theme.
- Cheese Board: A selection of cheeses and crackers can balance out the sweetness with savory options, great for adult gatherings.
- Halloween Punch: A fun, themed drink adds a festive touch to your dessert table.
Storage and Reheating
- Refrigerator Storage: Store uneaten cake pop brains in an airtight container in the refrigerator for up to a week.
- Freezer Storage: For longer storage, you can freeze the cake pops before coating. Wrap them tightly in plastic wrap and place them in a freezer-safe bag for up to a month.
- Reheating Method: While cake pops don’t require reheating, if frozen, let them thaw overnight in the fridge before serving.
- Preserve Texture: Avoid keeping them in warm conditions as the candy coating may become too soft.
Common Mistakes to Avoid
- Overmixing: When combining the cake and frosting, avoid overmixing, which can lead to a dense texture.
- Too Much Frosting: Adding too much frosting can make the cake pops overly soft and difficult to shape.
- Ignoring Chill Times: Skipping the chilling steps can result in a mess when trying to coat or fill the cake pops.
- Inconsistent Sizes: Try to maintain consistent sizes when shaping the cake pops to ensure even coating and cooking.
- Not Using Oil-Based Food Coloring: Regular food coloring can cause the candy coating to seize, so opt for oil-based versions for best results.
Cake Pop Brains: Background & Cultural Inspiration
Cake pops, like these Cake Pop Brains, have surged in popularity over the years, inspired largely by the desire for creative and fun dessert options. These treats combine classic cake flavors with modern presentation. Their whimsical designs appeal especially to children and add an element of fun to any celebration. Variations of cake pops have been featured in various cultures, often served at celebrations to symbolize sweetness and joy. The Halloween twist with the brain shape pays homage to the seasonal festivities, blending food with spooky decorations.
Frequently Asked Questions
Can I make these cake pops in advance?
Yes, cake pops can be made ahead of time! Shape and coat them a few days in advance and store them in the refrigerator until you’re ready to serve.
What can I use instead of red velvet cake?
If red velvet isn’t your preference, feel free to substitute it with any flavor of cake you enjoy, such as chocolate or vanilla.
How can I adjust the sweetness of the filling?
You can reduce the sweetness by using a less sweet jam or opting for a flavored cream cheese filling to balance the flavors.
Can I change the colors of the candy coating?
Absolutely! You can use any oil-based candy melts or food coloring to achieve the desired aesthetic. Don’t be afraid to get creative!
What should I do if my coating is too thick?
If your candy coating thickens, add a small amount of vegetable shortening or coconut oil and microwave gently until it reaches a smooth consistency.
Final Thoughts
Cake Pop Brains are not just tasty; they’re a fun and creative way to celebrate fall festivities and Halloween. With simple ingredients, they offer a personal touch for any gathering, allowing both adults and children to indulge in a little spooky fun. Give this recipe a try, and you’ll see how easy it is to impress your friends and family with these cute and creepy treats!
PrintCake Pop Brains

Ghoulishly delightful cake pops shaped like brains, perfect for Halloween and fun gatherings.
- Prep Time: 30 minutes
- Cook Time: 10 minutes
- Total Time: 40 minutes
- Yield: 12 to 15 cake pops
- Category: Dessert
- Method: Baking
- Cuisine: American
- Diet: Vegetarian
Ingredients
- 3–4 cups crumbled red velvet or chocolate cake
- ¼–½ cup vanilla or cream cheese frosting
- ~½ cup seedless raspberry or cherry jam
- Red food coloring
- 6–8 oz white candy melts or colored wafers (ruby, green, pink)
- Oil-based food coloring (pink and red)
- Lollipop sticks
- Silicone brain mold (or knife for hand shaping)
Instructions
- Prepare the Cake Mixture: Start by crumbling your red velvet or chocolate cake into a large mixing bowl. Gradually mix in the frosting until the mixture holds together when squeezed.
- Shape the Brains: Firmly press the cake mixture into the mold, or shape by hand into ovals to create a brain-like appearance.
- Create the Shells: Melt your candy coating and brush a thin layer into the molds, or around the shaped cakes. Chill until set.
- Add the Filling: Mix jam with red food coloring and spoon a small amount into each hardened candy shell.
- Fill with Cake Mixture: Use the remaining mixture to fill the cavities again, smoothing the tops.
- Seal: Pour more melted candy over the top and chill again until firm.
- Decorate: Pipe lines with melted candy to mimic brain ridges and add sprinkles.
- Serve: Carefully unmold the cake pops, insert lollipop sticks, and arrange on a platter.
Notes
Use high-quality ingredients for better flavor and ensure to chill as directed to set the coatings properly.












