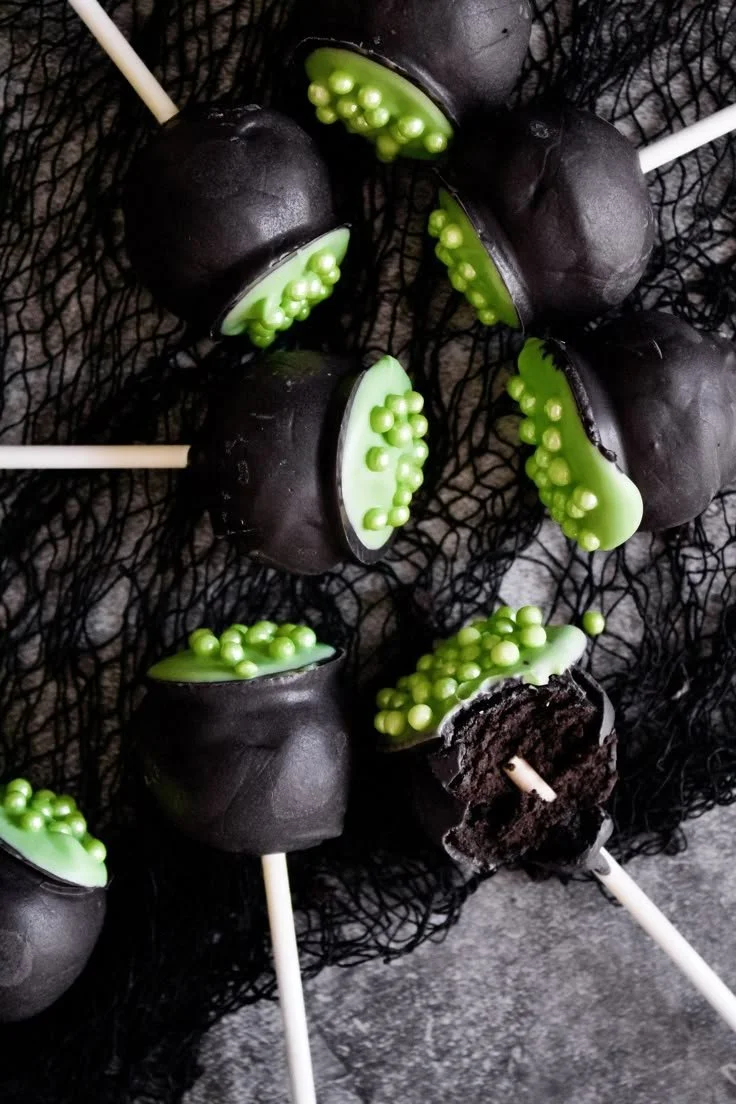
Black Chocolate Cauldron Cake Pops are an enchanting treat that perfectly combine the essence of Halloween with delicious cake. These delightful little pops are not only fun to make but also a real showstopper at parties, especially for your themed gatherings. With their rich chocolate flavor and playful presentation, they are definitely worth the effort!
Why You’ll Love Black Chocolate Cauldron Cake Pops
- Fun and Interactive: Making cake pops is a fun activity that can involve the whole family, allowing everyone to get creative with decorations.
- Perfect for All Occasions: These cake pops are ideal for Halloween parties, school events, or any celebration where you want to impress with a unique treat.
- Customizable: You can easily adjust the flavors and decorations to fit different themes, making them versatile for any event.
- Portable Treats: Cake pops are easy to transport, making them a convenient option for gatherings where you want to serve something sweet without the mess.
- Rich Chocolate Flavor: The deep, dark chocolate used in these cake pops provides a satisfying and indulgent experience for chocolate lovers.
Recipe Overview
- Prep Time: 30 minutes
- Cook Time: 20 minutes
- Total Time: 50 minutes
- Servings: Makes about 24 cake pops
- Difficulty Level: Medium
Ingredients You’ll Need for Black Chocolate Cauldron Cake Pops
-
For the Cake:
- 1 box chocolate cake mix (plus ingredients called for on the box)
- 1 cup chocolate frosting (store-bought or homemade)
-
For the Coating:
- 1 ½ cups dark chocolate melting wafers or chocolate chips (for dipping)
- Edible luster dust (for decoration, optional)
-
For the Cauldron Shapes:
- 24 lollipop sticks
- 24 mini chocolate cauldrons (petite chocolate candy cups)
Tip: Using a cake mix saves time, but feel free to use a homemade chocolate cake recipe if you prefer!
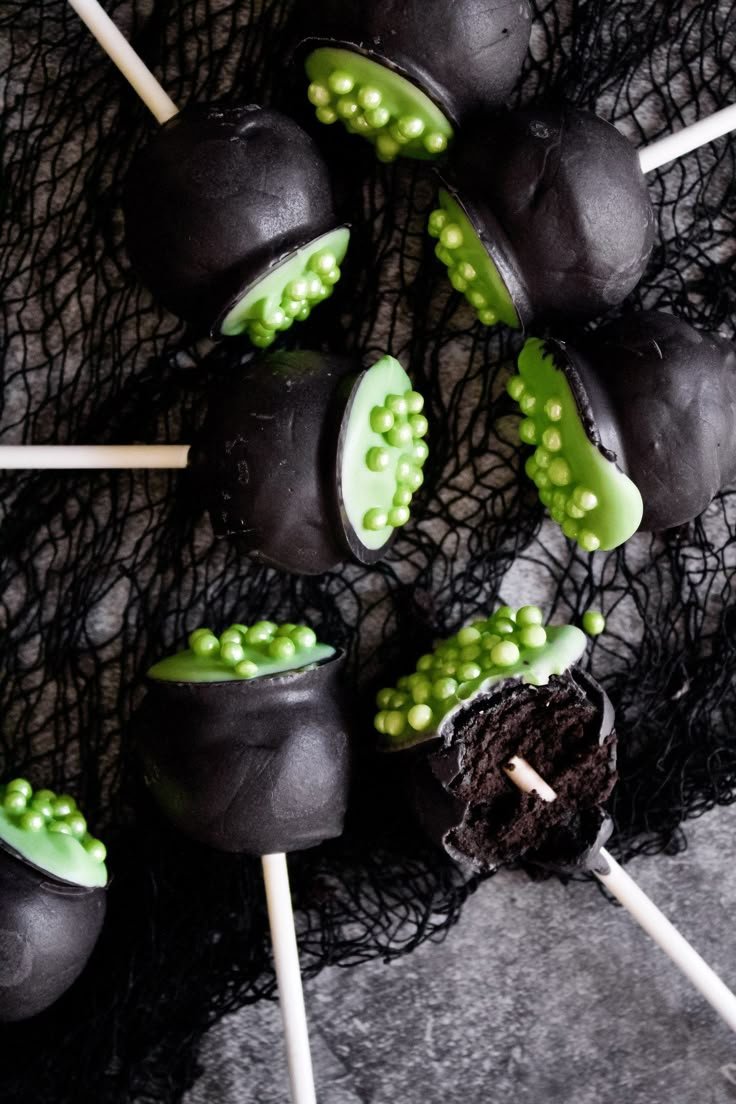
How to Make Black Chocolate Cauldron Cake Pops
-
Bake the Cake
Prepare the chocolate cake mix according to the package instructions. Once baked, let the cake cool completely. -
Crumble the Cake
After the cake has cooled, crumble it into a large mixing bowl until it resembles fine breadcrumbs. -
Mix in Frosting
Add the chocolate frosting to the crumbled cake. Mix until fully incorporated, forming a dough-like consistency. -
Shape the Cake Pops
Using your hands, scoop out small portions of the cake mixture and roll them into balls about 1 inch in diameter. Place on a baking sheet lined with parchment paper. -
Chill the Pops
Refrigerate the cake balls for at least 30 minutes or until they are firm. This step helps them hold their shape when dipped in chocolate. -
Prepare for Dipping
Melt the dark chocolate melting wafers according to package instructions. If using a double boiler, ensure the bowl doesn’t touch the water. -
Insert Sticks
Dip the end of each lollipop stick into the melted chocolate, then insert it into a cake ball. This helps the stick adhere better. -
Dip the Cake Pops
Once the sticks are in place, dip each cake pop into the melted chocolate, tapping off excess chocolate. Ensure it’s fully coated for an even finish. -
Add Cauldron Shape
Immediately place the dipped cake pops in the mini chocolate cauldrons. Let them cool completely at room temperature or in the refrigerator to set the chocolate. -
Decorate
If desired, use edible luster dust to sprinkle on top of the pops for a magical finishing touch before serving.
Tips for Success
- Use Good Quality Chocolate: For best flavor and coating, invest in high-quality melting chocolate.
- Chill Properly: Make sure your cake balls are well-chilled before dipping. This prevents them from falling apart.
- Work Quickly: Once the chocolate is melted, work fast to dip each pop before the coating begins to set.
- Avoid Overheating Chocolate: Melt the chocolate slowly to ensure it doesn’t burn, which will ruin the texture.
- Choose Your Decorations Wisely: Stay within the theme—consider using sprinkles, colored melts, or themed edible decorations depending on the occasion.
Easy Variations
- Flavor Swap: Use vanilla or red velvet cake instead of chocolate for a different flavor profile.
- Add Fillings: Incorporate caramel, peanut butter, or raspberry filling inside the cake pops for an extra surprise.
- Spice it Up: Mix in a dash of cinnamon or cayenne to infuse warmth and depth to the chocolate.
- Cheesecake Pops: For a creamy twist, use a no-bake cheesecake mixture instead of the cake and frosting combination.
- Frosting Dips: Instead of chocolate melted wafers, use different flavored melts like white chocolate or butterscotch.
What to Serve with Black Chocolate Cauldron Cake Pops
- Hot Chocolate: The rich chocolate experience of hot cocoa complements the cake pops beautifully on a cold evening.
- Milkshakes: Pair these pops with a creamy milkshake for a decadent dessert treat.
- Coffee: A warm cup of coffee enhances the chocolate flavor when enjoyed alongside cake pops.
- Mini Ghost Cupcakes: Offer a spooky option with mini cupcakes decorated to match the theme.
- Halloween Fruit Platter: A fresh fruit platter with Halloween-themed designs adds a refreshing contrast.
Storage and Reheating
- Refrigerator Storage: Keep the cake pops refrigerated in an airtight container for up to one week.
- Freezer Storage: You can freeze cake pops for up to 3 months. Make sure they are wrapped well to prevent freezer burn.
- Reheating Method: Thaw cake pops in the refrigerator overnight rather than at room temperature to maintain their texture.
- Texture Preservation: Be mindful of how you package them; use parchment paper to cushion them and avoid sticking.
Common Mistakes to Avoid
- Not Chilling: Skipping the chilling step can result in collapsing cake pops; always let them firm up first.
- Over-Dipping: Ensure you tap off excess chocolate after dipping to prevent a bulky coating.
- Ignoring Crumbs: Failing to crumble the cake finely can lead to an uneven texture. Be thorough!
- Improper Stick Insertion: Don’t insert the stick too far; it should be halfway through the cake ball for balance.
- Using Cold Chocolate: If chocolate is too cold or thick, it won’t adhere well. Aim for a smooth, velvety consistency when dipping.
Black Chocolate Cauldron Cake Pops: Background & Cultural Inspiration
Black Chocolate Cauldron Cake Pops draw inspiration from Halloween lore, where both the colors of black and the idea of cauldrons symbolize magic and enchantment. Traditionally, cauldrons were associated with witches brewing potions, making these treats perfect for Halloween celebrations. Cake pops themselves have gained popularity in the baking community for their charming presentation and versatility, allowing bakers to create festive variations to delight guests. They represent a blend of creativity and culinary art, turning simple ingredients into something extraordinary.
Frequently Asked Questions
Can I make these cake pops in advance?
Yes, you can prepare the cake pops a day or two in advance. Just store them in a cool place before serving.
What can I substitute for chocolate cake mix?
You can use any cake mix you prefer, such as vanilla or red velvet, keeping in mind that the flavor profile will change.
How can I make these cake pops less sweet?
Try adjusting the frosting quantity or choose a dark chocolate that isn’t overly sweet to balance the flavors.
Can I use white chocolate for coating?
Absolutely! White chocolate can be a lovely alternative, and you can add food coloring for themed occasions.
What if my cake pops are falling off the stick?
Ensure your cake balls are well chilled before inserting the sticks, and avoid dipping them too deeply into the chocolate.
Final Thoughts
Black Chocolate Cauldron Cake Pops are a delightful treat that can bring joy and a touch of magic to any gathering. They are easy to customize, fun to make, and absolutely delicious. Whether you’re throwing a Halloween party or simply indulging in a sweet treat, these cake pops will impress your family and friends. Give them a try, and enjoy the smiles they bring!
PrintBlack Chocolate Cauldron Cake Pops
Enchanting and delicious cake pops that combine rich chocolate flavor with a fun presentation, perfect for Halloween celebrations.
- Prep Time: 30 minutes
- Cook Time: 20 minutes
- Total Time: 50 minutes
- Yield: 24 servings
- Category: Dessert
- Method: Baking
- Cuisine: American
- Diet: Vegetarian
Ingredients
- 1 box chocolate cake mix (plus ingredients called for on the box)
- 1 cup chocolate frosting (store-bought or homemade)
- 1 ½ cups dark chocolate melting wafers or chocolate chips (for dipping)
- Edible luster dust (for decoration, optional)
- 24 lollipop sticks
- 24 mini chocolate cauldrons (petite chocolate candy cups)
Instructions
- Bake the cake: Prepare the chocolate cake mix according to the package instructions. Once baked, let the cake cool completely.
- Crumble the cake: After the cake has cooled, crumble it into a large mixing bowl until it resembles fine breadcrumbs.
- Mix in frosting: Add the chocolate frosting to the crumbled cake. Mix until fully incorporated, forming a dough-like consistency.
- Shape the cake pops: Using your hands, scoop out small portions of the cake mixture and roll them into balls about 1 inch in diameter. Place on a baking sheet lined with parchment paper.
- Chill the pops: Refrigerate the cake balls for at least 30 minutes or until they are firm. This step helps them hold their shape when dipped in chocolate.
- Prepare for dipping: Melt the dark chocolate melting wafers according to package instructions. If using a double boiler, ensure the bowl doesn’t touch the water.
- Insert sticks: Dip the end of each lollipop stick into the melted chocolate, then insert it into a cake ball. This helps the stick adhere better.
- Dip the cake pops: Once the sticks are in place, dip each cake pop into the melted chocolate, tapping off excess chocolate. Ensure it’s fully coated for an even finish.
- Add cauldron shape: Immediately place the dipped cake pops in the mini chocolate cauldrons. Let them cool completely at room temperature or in the refrigerator to set the chocolate.
- Decorate: If desired, use edible luster dust to sprinkle on top of the pops for a magical finishing touch before serving.
Notes
Use good quality chocolate for the best flavor. Chill the cake balls properly to prevent collapsing. Work quickly with melted chocolate to maintain smooth coating.












