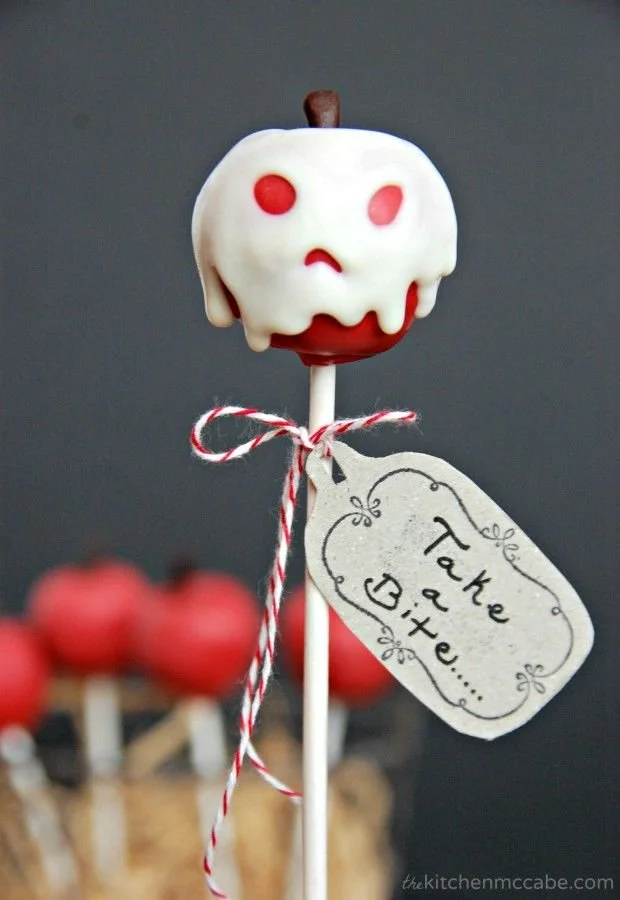
Making cake pops is a delightful and easy way to impress your friends and family. This recipe for Cake Pops brings together the fun of cake and the convenience of handheld treats, making it perfect for parties, holidays, or just a sweet snack at home. With a few simple ingredients and steps, you’ll create a treat that’s not only tasty but also visually appealing and fun to make!
Why You’ll Love Cake Pops
- Easy to Make: If you’re new to baking, this recipe is an excellent way to get started. It involves simple steps that don’t require special skills.
- Customizable Flavors: You can use any cake mix and frosting flavor, allowing you to personalize these treats for any occasion.
- Fun for Everyone: Whether it’s a birthday party, Halloween, or a family gathering, cake pops are always a hit, particularly with kids.
- Great for Meal Prep: You can make a large batch in advance and store them, making them an easy grab-and-go snack.
- Decorative and Elegant: These eye-catching treats can be decorated in various ways, making them suitable for celebrations or a special dessert.
Recipe Overview
- Prep Time: 30 minutes (plus cooling time)
- Cook Time: 25-30 minutes
- Total Time: 1 hour (plus chilling time)
- Servings: Approximately 24 cake pops
- Difficulty Level: Easy
Ingredients You’ll Need for Cake Pops
- 1 box of cake mix (any flavor)
- 3 eggs
- 1 cup of water
- 1/2 cup of oil
- 1 cup of frosting (any flavor)
- Candy melts (red, green, black)
- Lollipop sticks
- Edible glitter (optional)
Notes:
- Cake mix and frosting work best when they complement each other; for example, chocolate cake mix with vanilla frosting.
- Optional edible glitter can add a festive touch that works well for special occasions.

How to Make Cake Pops
-
Prepare the Cake Mix: Preheat your oven as directed on the cake mix box. Prepare the cake mix according to the package instructions, and bake in a 9×13 inch pan.
-
Cool Completely: Once baked, let the cake cool completely at room temperature.
-
Crumble the Cake: After the cake has cooled, crumble it into a large bowl using your hands or a fork until it has a fine texture.
-
Mix with Frosting: Add the frosting to the crumbled cake, mixing until well combined. The mixture should be moist but not overly wet.
-
Form into Balls: Roll the mixture into small balls, about the size of a tablespoon, and place them on a baking tray.
-
Chill the Cake Balls: Refrigerate for about 30 minutes to firm them up, making them easier to dip.
-
Melt the Candy Melts: Melt the candy melts according to package instructions in a microwave or double boiler until smooth.
-
Insert Lollipop Sticks: Dip one end of the lollipop sticks into the melted candy, then insert them into each cake ball about halfway.
-
Coat the Cake Pops: Dip each cake ball into the melted candy, ensuring they are fully coated. Allow the excess candy to drip off.
-
Set the Cake Pops: Place the coated cake pops upright in a styrofoam block or a cake pop stand.
-
Decorate: Allow the coating to set and harden. You can decorate with edible glitter or additional melted candy if desired.
Tips for Success
- Bake Evenly: Ensure your oven is preheated and avoid opening the oven door too often while baking to maintain a consistent temperature.
- Consistent Size: Use a cookie scoop to ensure your cake balls are all the same size for even baking and coating.
- Don’t Skip Chilling: Chilling the formed cake balls is crucial. It helps them maintain their shape after dipping.
- Melt Candy Carefully: When melting candy melts, use short bursts in the microwave and stir frequently to avoid burning.
- Drip Off Excess: Allow enough time for excess candy coating to drip off; too much can lead to a messy finish.
Easy Variations
- Chocolate Cake Pops: Use chocolate cake mix and chocolate frosting, then coat with dark chocolate candy melts.
- Rainbow Cake Pops: Prepare a rainbow layer cake, crumble it, and layer with a light frosting for colorful pops.
- Gluten-Free Option: Use a gluten-free cake mix and frosting to accommodate dietary needs.
- Seasonal Decor: For holidays, add themed sprinkles or color the candy melts accordingly (like red and green for Christmas).
- Add Flavoring: Mix in flavor extracts, such as vanilla or almond, into the cake mixture for extra depth.
What to Serve with Cake Pops
- Milk: A classic pairing; the creaminess of milk complements the sweetness of cake pops.
- Ice Cream: Serve with a scoop of your favorite ice cream for a fun dessert combo.
- Coffee: The richness of coffee pairs well with the sweetness of these treats, making for a delightful afternoon pick-me-up.
- Fruit Skewers: Fresh fruit adds a refreshing balance to the indulgence of cake pops, brightening up the plate.
- Mini Cupcakes: A combination of treats can make for an impressive dessert table at gatherings.
Storage and Reheating
- Refrigerator Storage: Store cake pops in an airtight container in the refrigerator for up to one week.
- Freezer Storage: For longer storage, freeze uncoated cake balls for up to three months. When ready to use, thaw before coating with candy melts.
- Best Reheating Method: If you need to refresh frozen pops, let them sit at room temperature for about 15 minutes before enjoying to retain their texture.
- Preserving Texture: To maintain the coating’s snap, avoid refrigerating finished cake pops; keep them at room temperature in a cool, dry place.
Common Mistakes to Avoid
- Overmixing the Cake: Avoid overmixing the cake mixture when preparing, as it can result in tough cake pops.
- Skipping the Chill Time: Failing to chill the cake balls can lead to them falling apart when dipped in candy coating.
- Burning the Candy Melts: Melt the candy at low power in the microwave to prevent burning. Stir often for best results.
- Inserting Sticks Too Deep: Only insert the lollipop sticks halfway into the balls to maintain their shape during coating.
- Not Coating Evenly: Dip the cake pops quickly and evenly to ensure a smooth finish without too much buildup.
Cake Pops: Background & Cultural Inspiration
Cake pops have gained popularity in the past decade, especially in the United States, as a fun dessert option, particularly for celebrations. Originating from the concept of cake balls, they take the familiar enjoyment of cake and transform it into a portable treat. They gained massive popularity in bakeries and social media, inspiring countless home bakers to create their versions. Cake pops have expanded into various colors, designs, and themes, becoming staples at birthday parties, weddings, and holidays, showcasing creativity and personal touch.
Frequently Asked Questions
Can I use any flavor of cake mix?
Yes! You can choose any cake mix flavor you prefer, whether it’s vanilla, chocolate, or something more unique.
How do I store leftover cake pops?
Keep leftover cake pops in an airtight container in the refrigerator for up to a week or freeze them for longer storage.
Can I make these ahead of time?
Absolutely! Cake pops can be made a few days in advance; just store them properly to ensure freshness.
How do I get a smooth coating?
Make sure the candy melts are fully melted and smooth before dipping. Avoid getting any moisture in the melts.
Can I use different types of frosting?
Yes, any frosting can be used. Just ensure it complements the cake flavor for the best results.
Final Thoughts
Making cake pops is a delightful activity that anyone can enjoy, whether you’re a beginner baker or an experienced home cook. This cake pops recipe offers a simple way to create tasty treats that are perfect for any occasion. With their customizable nature and fun appearance, you’re bound to impress your guests and satisfy your sweet tooth. Give this recipe a try, and enjoy the process of making these charming little desserts!












