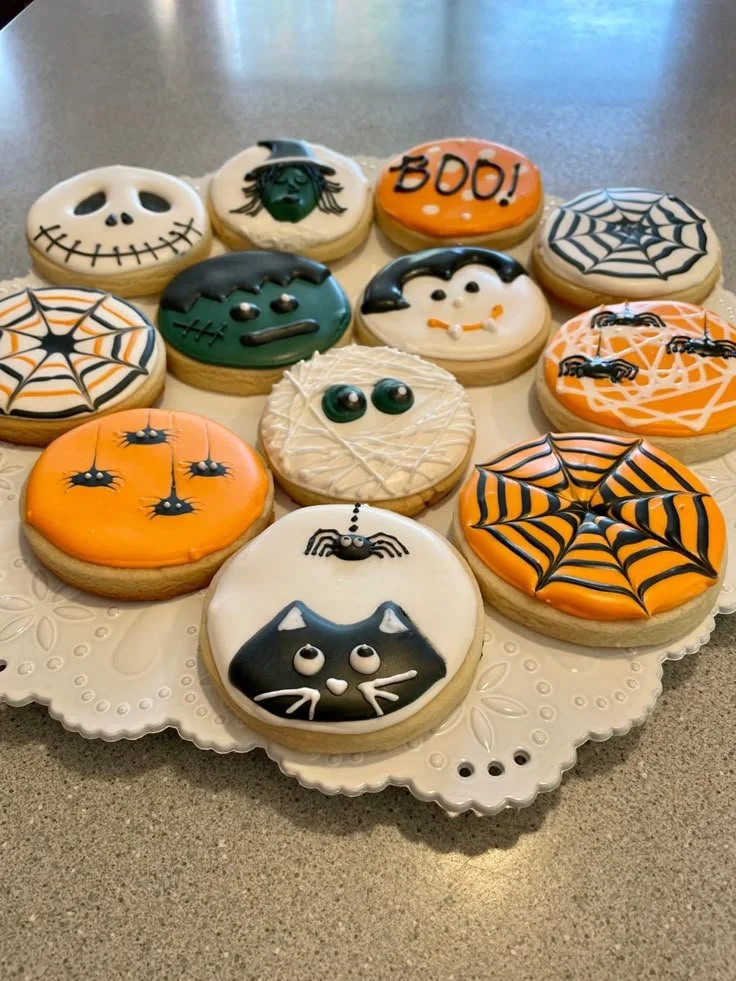
Halloween Cookies are a delightful treat that brings festive cheer to any gathering. With their playful icing designs and soft, buttery texture, these cookies are perfect for sharing with friends and family during the spooky season. Plus, they’re easy to make, so even beginner bakers can join in on the fun!
Why You’ll Love Halloween Cookies
- Fun for Everyone: Decorating these cookies is a creative activity that kids and adults can enjoy together, making them perfect for Halloween parties.
- Deliciously Buttery: The rich buttery flavor combined with sweetness makes these cookies irresistible, especially when topped with colorful icing.
- Customizable Designs: You can let your imagination run wild with Halloween-themed decorations, from ghosts to pumpkins, allowing for unique designs every time.
- Quick & Easy: This recipe is straightforward, with minimal ingredients and steps, making it ideal for busy schedules or last-minute treats.
- Perfect for Gift-Giving: Package these cookies in decorative boxes or bags to give as thoughtful homemade gifts to friends and neighbors this Halloween.
Recipe Overview
- Prep Time: 20 minutes
- Cook Time: 10 minutes
- Total Time: 30 minutes
- Servings: 24 cookies
- Difficulty Level: Easy
Ingredients You’ll Need for Halloween Cookies
-
Dough:
- 2 3/4 cups all-purpose flour
- 1 teaspoon baking soda
- 1/2 teaspoon baking powder
- 1 cup unsalted butter, softened
- 1 1/2 cups white sugar
- 1 egg
- 1 teaspoon vanilla extract
- 1/2 teaspoon almond extract
-
Icing:
- 3 cups confectioners’ sugar
- 2 tablespoons meringue powder
- Water (amount varies)
- Food coloring (optional)
Be sure to soften the butter to room temperature for a smoother dough, and feel free to swap almond extract with more vanilla if you prefer a different flavor profile.
How to Make Halloween Cookies
- Preheat the Oven: Preheat your oven to 375°F (190°C).
- Prepare the Dry Ingredients: In a medium bowl, combine the flour, baking soda, and baking powder. Mix well and set aside.
- Cream Butter and Sugar: In a large mixing bowl, beat the softened butter and white sugar together until the mixture is smooth and creamy.
- Add Egg and Extracts: Incorporate the egg, vanilla extract, and almond extract into the butter-sugar mixture until fully combined.
- Combine Mixtures: Gradually add the dry ingredients to the wet mixture, stirring until the dough comes together.
- Form Cookies: Roll the dough into balls about 1 inch in diameter and place them on a baking sheet lined with parchment paper.
- Flatten the Dough: Gently flatten each dough ball with the palm of your hand.
- Bake: Bake the cookies in the preheated oven for 8 to 10 minutes, or until the edges are lightly golden.
- Cool: Allow the cookies to cool on the baking sheet for a few minutes before transferring them to a wire rack to cool completely.
- Prepare the Icing: In a separate bowl, mix confectioners’ sugar, meringue powder, and enough water until you achieve a smooth, spreadable consistency.
- Add Color (Optional): If you want to use food coloring, divide the icing into separate bowls and mix in desired colors.
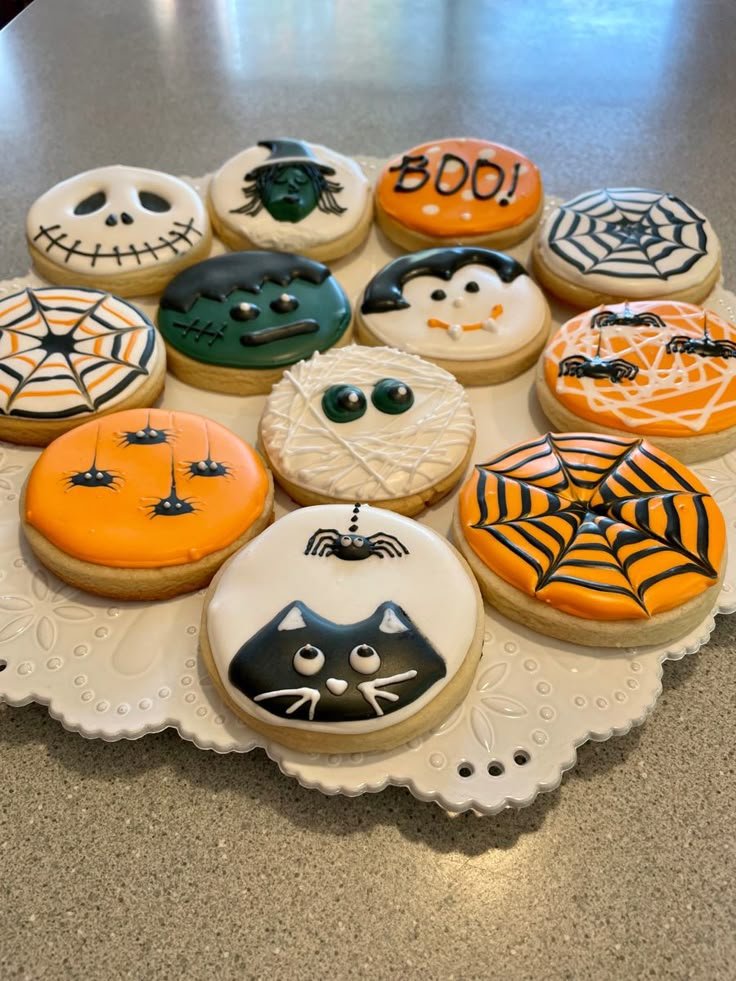
- Decorate: Use the icing to decorate the cooled cookies in fun Halloween designs like ghosts, pumpkins, or spiders.
Tips for Success
- Measure Accurately: For best results, make sure to measure your flour properly—spoon it into the measuring cup and level it off instead of scooping.
- Don’t Overbake: Keep an eye on your cookies; they’ll continue to firm up after being taken out of the oven, so pull them when they are just set.
- Chill for Design: If you find the dough sticky, chill it for 15-30 minutes to make rolling easier.
- Thicker Icing for Detail: For more intricate designs, use a thicker icing and a piping bag to achieve precision in decoration.
- Taste Test the Icing: Adjust the sweetness of your icing by adding more confectioners’ sugar or a splash of milk for a smoother finish.
Easy Variations
- Add Chocolate Chips: Stir in 1 cup of chocolate chips for a delightful twist on classic cookies.
- Switch the Extracts: Use orange or lemon extract instead of vanilla or almond for a different flavor combination.
- Pumpkin Spice: Add 1 teaspoon of pumpkin pie spice to the dough for a seasonal flavor kick.
- Food Color Success: Instead of icing, dip cookies in melted chocolate and sprinkle with Halloween-themed toppings like crushed Oreos or sprinkles.
- Shape Variations: Use cookie cutters to make Halloween shapes like bats, witches, or cats for added fun.
What to Serve with Halloween Cookies!
- Milk or Plant-Based Milks: A classic pairing that complements the sweetness, perfect for dunking cookies.
- Coffee or Tea: A warm beverage balances the sweetness of the cookies, ideal for adult gatherings.
- Ice Cream: Serve cookies alongside a scoop of vanilla or pumpkin ice cream for a delightful dessert experience.
- Fruit Salad: A fresh fruit salad offers a refreshing contrast to the rich cookies.
- Cheese Board: Combine with mild cheeses and nuts for a unique party platter.
Storage and Reheating
- Refrigerator Storage: Store the cookies in an airtight container at room temperature for up to one week.
- Freezer Storage: You can freeze the baked cookies in a single layer wrapped in plastic wrap and then placed in a freezer bag for up to three months.
- Reheating: To enjoy the cookies warm, pop them in the microwave for about 10 seconds.
- Preserving Texture: Keep the container sealed to prevent the cookies from drying out; for frozen cookies, allow them to thaw at room temperature before eating.
Common Mistakes to Avoid
- Skipping Baking Powder: Make sure to include both baking powder and baking soda for the right texture; otherwise, cookies may not rise well.
- Not Cooling Completely: Ice the cookies when they are still warm, and you risk the icing melting instead of setting.
- Using Cold Butter: Always use softened butter to create a creamy consistency when mixing; cold butter prevents proper incorporation.
- Overmixing the Dough: Mix only until combined to prevent tough cookies; the dough should remain slightly sticky but manageable.
- Not Preheating the Oven: Always preheat your oven to ensure even baking; putting cookies in a cold oven can affect the final texture.
Halloween Cookies: Background & Cultural Inspiration
Halloween cookies have a rich history, often tied to the celebration of Halloween itself. Traditionally, families would bake themed treats to celebrate Harvest festivals and autumn harvests. Over time, this evolved into more decorative cookies with intricate designs prominently displayed during Halloween. These treats became associated with gathering and sharing, embodying community spirit and creativity. In many cultures, baking at Halloween transforms into a joyful tradition that encourages family bonding and festivity. Today, Halloween cookies reflect the creativity and imagination of the baker, representing a canvas for seasonal themes, flavors, and fun!
Frequently Asked Questions
Can I use gluten-free flour for Halloween cookies?
Yes, you can use a gluten-free all-purpose flour blend as a substitute, but be sure to check that it contains xanthan gum for the best texture.
How do I store the decorated cookies?
Store decorated cookies in an airtight container, separating layers with parchment paper to prevent the icing from sticking.
Can I prepare the dough ahead of time?
Absolutely! You can make the dough and refrigerate it for up to 3 days or freeze it for later use; just bring it back to room temperature before rolling.
What type of food coloring is best for the icing?
Gel food coloring is often preferred for icing as it does not thin the icing and produces vibrant colors.
How can I fix runny icing?
If your icing is too runny, add more confectioners’ sugar gradually until the desired consistency is achieved.
Final Thoughts
Making Halloween Cookies is not just about baking; it’s a delightful way to celebrate the spooky season with loved ones. Their buttery flavor and festive designs will surely bring smiles and joy to your gatherings. So gather the family, embrace your creativity, and create your own memorable Halloween tradition with these fun cookies!












